In reviewing work from previous chapters the need to hone in on areas that needed more exploration and fill gaps in design ideas and technique became apparent if there was to be a functional piece of work at the end.
Exploring the Fibonnacci Sequence and Golden Section had not touched on the use of curves and circles in my design. So set off to revisit the Golden section by reducing down in size and setting up a sample by using a black work stitching onto embroidery fabric. This piece was then photocopied and reversed, by printing onto acetate, achieving a series of joining spirals. Exploring a larger sample to establish a more completed spiral was satisfying and could be used as a singular or as another composite.
Ref Page 55 sample a Ref Page 55 Sample b
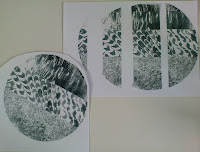
Looking at my papers the need to explore circles with the intervention of Fibronnaci dawned and from that came: an egg out of a circle and then an omelette!
Ref Page 55 sample c Ref page 55 sample d
With these images touching on the endless possibilities of shapes from patterns and cut the next journey began on further design exercises.A series of paper strips showing bold and and light patterns and dark and light tones were produced in a series of sizes, the first series were narrow strips:
Ref Page 56 Samples from top: a, b, c Ref Page 56 Sample d, e, f
Ref Page 56 Sample G page from top left f straight cut, b diagonal cut:
Top right a straight cut fibronacci b straight cut:
Bottom left b curved cuts, which gave a lunar appearance, see below
Bottom right d triangular cuts

 The second series of samples are from a selection of varying widths which are included in each range of samples beside the following sample shapes and sequences.
Ref Page 57 paper A sample iii Ref Page 57 paper A sample iv
Ref Page 57 paper A sample v Ref page 57 paper A sample vi
Ref Page 57 paper A sample vii
While samples v and vi were originally designed to explore circles and spirals it became apparent that a right angled triangle wasn't the best shape and noted that I should try different triangles in the future; this connected with the possibility of using gores to add shape into an item. Papers B and C below produced their best results in the first cuts subsequent playing appeared more
Squares to stack and whack were produced as the third series. Single patterns were used as well as combinations.
Ref Page 58 Paper B Ref Page 58 Paper C

 The top row samples were then cut into linear sections and the lower row were cut into triangular shapes
Ref Page 59 Sample a
Ref Page 59 sample b
The linear sections on the top row of sample b were cut into triangles and play continued:
Ref Page 59 sample b) i
Ref Page 59 sample b) ii Moving into a straight line seemed to lose impact but then Page 59 sample b) iii fish tails or feathers?
The triangles on bottom row of 59 b were then cut in linear format and gaps were left to allow bolder contrast
Ref Page 59 b) iv Ref Page 59 b) v
By turning the pattern upside down I liked the diagonal and diamond patterns that were formed and considered how these could be highlighted.
Ref Page 59 b) vi
While I could see opposite directional 'arrows' on the middle section that led from the left hand side and into the right hand side and the smaller and larger squares could be considered fish like I felt it may not be a very apparent image!! Lets hope translating into fabric and stitch will see more progress in image making by play rather than too much brain input!


