Wednesday, 28 May 2014

Three Artist

Jenny Raiment
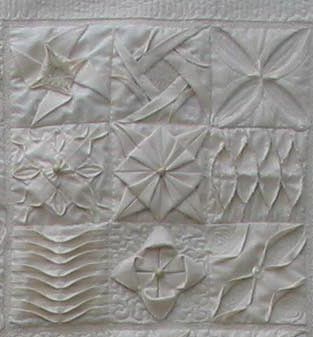
Known as the Muslin Mistress Jenny obviously has a reputation for her expertise in the field of creating textural surfaces. While the procedure for making the pieces concentrates on detail and accurate cutting and sewing I was heartened to read
her quotes , 'Mistakes do not matter the result is just different' from  Tucks, Textures and Pleats and 'You can't go wrong, it's just different' from Tucks and Textures Two, St Richard's Press Limited. The sense of reality that one gets from such remarks and the images of some of Jenny's clothing designs also reveals a sense of fun and enjoyment.
Suduko - whole 
Suduko detail
It was a real bonus to see Jenny and her quilts in person at the NEC show in March.  Judging from the number of people talking to her, the questions they were asking and the fact that she was preparing samples for a forthcoming workshop she is obviously in demand and has a wealth of inspiring ideas.  As I prefer doing Sudoku to crossword puzzles it was topical to see her 'Sudoku 'quilt.
The designs that I have chosen to include are; All Squared Up in which the striking black and white contrasts are used to explore apertures and layers being peeling back.  Jenny's generosity of information is prevalent on her web site and would encourage anyone to have a go with the clear instructions and teasing combinations.

All Squared up
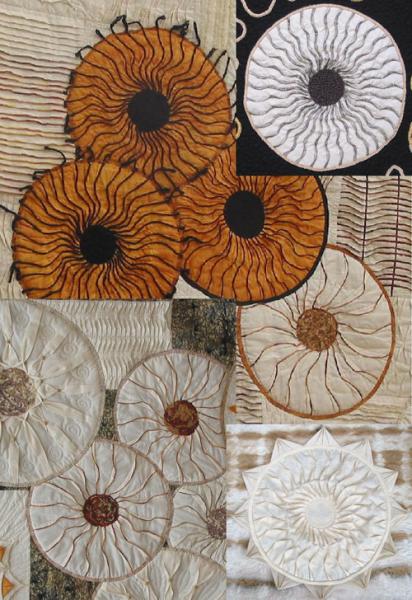
In contrast this piece, seen left, explores and introduces subtlety of colour contrast beside an original black and white image in the top right hand corner. The  touch of colour adds a feeling of movement through the shapes lapping over and under and the stitches and tucks defining variations on a theme that crosses over and under the rectangles that join across the piece.

http://www.jennierayment.com/

Michael Brennand-Wood

A member of the 62 Group, Michael's work combines line, structure and pattern and has, in his more recent work, a distinctive dimension -  components literally come of the cloth in an abundance of small detail.  His work as a curator and textile historian centres on understanding textile techniques and their context with textile history; it is a subject on which he lectures at Goldsmith College, London. The works I have chosen to show are from an earlier period in  his career which offer a foil for the development of later pieces:


Broken English 73 x 95 x 4, 1981
I have encountered difficulty in get images of the following pieces so have given a description and a web link


The light is only perfect for a very short time 1994 reminded me of the sample pieces we were asked to put together in Chapter 7. It shows how small pieces carefully collected can make an impact that as Aristotle noted , 'The whole is greater than the sum of the parts'.  In the past  I have preferred to set out to make a whole piece rather than produce lots of samples but this seems to present a way where you can have the best of both worlds.
Imaginary Landscape Rise and Fall 1999 has a combination of movement and symbolic shapes that have a textural quality.http://brennand-wood.com/pics/022.html


Wayne Higby


Born in 1943 Higby is an American ceramic artist who gained recognition following a show at the American Craft Museum in 1973.

I became aware of the work of Wayne Higby following a visit to the Renwick Gallery in Washington D.C. in 2009.  My interest in geology and landscape was immediately attracted to his incorporation of these aspects in his ceramics.  Since that introduction it has been fascinating to investigate the wide range and scale of his work.  The textural surfaces he achieves through a range of ceramic medium surely holds a parallel to what we strive for in textiles and in particular with this module.


 Focusing on landscape for a source of inspirations the size of his pieces vary from small vessels  and tiles to larger architectural pieces that make their own landscape such as the series Earth Clouds.  Higby says of his work that:

"I strive to establish a zone of quiet coherence – a place full of silent, empty space where finite and infinite, intimate and immense intersect."
This core value is, for me, apparent across all samples and sizes of his work and one I would love to aspire to.
In the late 70's his interest in Chinese porcelain and Raku techniques developed in a life time of studying and exploring the timeless possibilities of this technique. 
While his smaller pieces are often identifiable as ceramic vessels Higby often uses the shape to explore the imagery that inspires him rather than the utilitarian function of the vessel
Stone Gate, shown, below explores the use of space to draw the eye and give contrast to the detail and texture that surrounds it. Again sadly I cannot download images but the following connection should take you to a site.

http://antiquesandthearts.smugmug.com/Covers/Higby/


Stitch to Translate

 
Ref 5.10.1
Ref 5.10.2
Taking the rubbings made in Chapter 9 it was apparent that the images showed up better if left medium size.  The rub taken directly from a stone shown in Chapter 3, ref 5.3.1d and then changed to a negative image gave a good result.


Ref 5.10.3

Looking at the rubbings the following stitches came to mind: variations of bullion knots, loop stitch, an exploration of buttonhole stitch and needle weaving. I also wanted to experiment with Cretan stitch and use broad chain stitch as a solid filling.
Before deciding on stitches to translate the marks the fabric was placed over paper shapes and rubbed with oil pastel. Purchasing a slightly coarse black cotton for this task I felt the weave would take the stitch detail and rub better than the smoother black cotton I had used for stitches in Chapter 9. Learning from my mistake of using too small a piece of fabric in the previous chapter a long strip was made.
Ref 5.10.4
 Photos were taken of each rubbing and pictures were turned to stimulate ideas for stitching.  A strip of black fabric became the playground and different threads were used to interpret the fabric rubbing. The same threads were used for each stitch sample except on sample 4a where boucle and tape were also used to do the Litch stitch.

Ref 5.10.4a
Ref 5.10.4b
For the 4a sample french knot, bullion and Litch stitch were used, thanks Sian for information on the Litch stitch - a great stitch for knobby, knotted threads... and it fills spaces quickly! For the 4b sample I started using Cretan stitch but it soon took a journey into herringbone stitch.
Ref 5.10.4c
Ref 5.10.4d


For sample 4c the twists and turns of buttonhole stitch.For sample 4d chain stitch and open stitch were used.


Ref 5.10.5a
Ref 5.10.5b

In stitching the fabric rubbed images the enjoyment came in filling the negative spaces and turning the images around. It gave a feeling of connecting with those who have carved runes and marks onto stone...using the stone to tell its story of wear and tear.
Ref.5.10.5c

Ref 5.10.5d

For the ease of cross reference I have compared the original sequences below.


Ref 5.10.6 a and b

and now rubbings of the stitched pieces

ref 5.10.7 a
Ref 5.10.7b


Monday, 5 May 2014

Chapter 9 Stitching

Ref 5.9.1
Ref 5.9.2
 My thread library covered a range of natural and synthetic yarns.
Perle DMC 80(white and cream),60(cream) and crochet yarns in 5.9.1,cotton and linen threads, tanne (top), then  sulky, natural linen 50/2 , white linen 40/2 and natural cotton in 5.9.2, top three are cotton embroidery yarns and Anchor and Knockando wool yarns in 5.9.3 and synthetic ribbon top, then Monovic invisible yarn. rayon, silk gimp and paper yarn in 5.9.4


Ref 5.9.3
Ref 5.9.4


Working on a black cotton fabric I chose a simple six stranded embroidery cotton for Sample 1  allowing easy variation of thickness to 'shade' the samples. Looking through a host of stitch patterns, with inspiration from the timeless book by Constance Howard Book of Stitches I decided to chose the simplest stitch, a straight or running stitch to see just how much movement and variation I could achieve.
The samples are noted in columns A,B, and C and rows 1 - 4:
SAMPLE 1
A1 shows diagonal lines of running stitch worked in three rows each of 1 - 6 strands.
Ref 5.9.5a
A2 again works through the thicknesses of the thread a 'seed' effect using single stitches has been worked
A3 proved to be a more complex design of horizontal and vertical stepped stitches which would have been easier to work on a canvas structure fabric but persisted and while it looks uneven and not particularly formal its movement as the thread reduced  from 2 to 1 ply across the piece was worth keeping!
Ref  5.9.5b row 1
A4 Trellis effect where a long single diagonal stitch was woven with an opposite directional single stitch which was held in place with a vertical stitch.
Ref 5.9.5c row 2
B1 Two curved rows of running stitch were stitched in one thread and two thread thicknesses. Alternating the size and space of stitch for a second and third set of rows a meandering thread was used to give a feeling of movement.
B2 Back stitch rows were made in a similar sequence of reducing plys and increasing spaces
Ref 5.9.5d: b3,c3 and b4,c4
B3 Couched thread shows a meandering thick thread held in place by one ply of the embroidery yarn
B4 Milanese stitch worked in 3, 2 and 1 ply sequences.
C1 Random shapes in satin stitch gradually build up in this small sample with, hopefully, a feeling of a 'boulder' landscape
C2 Arrowhead stitch using thread variation and also space and size of stitch changes to add interest
C3 Stepped stitch with 1 - 6 ply thickness and gradually reducing spaces gives a hint of a reflective quality?
C4 Straight stitch in a circular pattern which looked quite interesting on both sides of the fabric
For the second sample a variety of threads were to be used to achieve more irregular effects on the same black fabric.  This could have proved to be a bad choice as some of the threads did not 'sit' easily on the fabric.  However as the sample was being used to get irregular  effects I decide to continue.  Note to self, 'perhaps it would be an idea to get a range of slightly large weave fabrics when doing final resolved sampling
The samples, noted in columns A,B, C and D and rows 1 - 4:
SAMPLE 2
A1 Weaving, cotton thread and paper string.
Ref 5.9.6a
A2 Meandering shapes were worked in wide nylon thread and then, to give a variation of width, introducing a thin sulky cotton thread stitched in between.  While the effect had a certain symmetry about the stitch intervals a more random approach could make more impact. Note to self: stop trying to make every stitch even - consider wearing eye mask or make reverse the right side!
A3 three stitches in cotton held by finer linen thread
A4time to play with loops held by back stitch in a variety of thread weights

B1 Weaving and looping woollen threads through perle running stitch.
B2 Long cotton thread weaving with contrasting thread weight of linen and sulky yarn
B3 Straight perle threads interwoven with cotton thread in straight and 'v' formation
Ref 5.9.6b samples a2 and b2


B4 Variety of threads from tanne to nylon ribbon used in stem stitch
C1 ribbon, linen and invisible thread used in elongated stem stitch
C2 cotton perle and cotton tube ribbon used in straight stitch over a thick cotton thread
C3 straight cotton threads stitches that intersected at random, a similar effect to seeding but using a running stitch
C4  Woollen threads held with random stitches

Rubbings from relief surface
In preparation for Chapter 10 Ref 5.9.7 shows the Texture and relief in papers from Chapter 3.  To the right of the images are rubbings done with an oil pastel.  The small images need to be blown up to help investigate the stitch patterns that will be used in the next chapter.


Paper relief into fabric relief

Deciding on five photos from Chapter 3 where paper had been used to interpret surfaces I felt it was vital that I should use a wide variety of fabric finishes explored in chapters  5, 6 and 7  to give me an opportunity to consider possibilities for final samples on landscapes.
Using my original photos and also using computer  embossing programmes to enhance them I decided the best bet for ensuring variety was to think through some ideas of storyboards before I started stitching. Notes and fabric were selected and five story boards surrounded me with variations of fabric selection on each board...this is what followed:
 Sample 1 Textured sample board - granite/quartz rocks
Ref 5.8.1

Fabric sample a) the fabrics appealed to me; nylon, chiffon, polyester, felt and slubbed linen.  The result of layering the top three three fabrics with the chiffon in the middle encouraged the idea to quilt the quartz lines of the stone. The 'tramlines were then cut open and distressed, to reveal the 'quartz' - or 'solid sunlight' in the words of George Wyllie.
Ref 5.8.1b
Fabric sample b) discarding the felt a sandwich of thread thrums was placed between two layers of chiffon and the linen. Stitched in place the chiffon was then cut away and the linen hand stitched to replicate surface pattern of the granite.
Ref 5.8.1 a


Sample 2 Textured surface board, chalk 'shell' fro Coral Beach, Isle of Skye
Ref 5.8.2


Fabric sample a)Taking the printed cotton and the silk organza strips a loose machine stitch was worked over the strips allowed me to gather the fabric.  This was then embellished with gimps and perle thread to replicate the 'worms' in the original shell.  Fabric sample b) using narrow tucks I gradually turned the fabric to try to get a a radiating pattern which sadly didn't work it looked far too angular despite trying the fabric into curves as I stitched!

Ref 5.8.2 a

Ref 5.8.2b


Fabric sample c) thought a simpler format might be a better option so cut a circle of felt and the zigzag stitched string to give the effect, not sure if I like right or wrong side best!

Ref 5.8.2c(i)
Ref 5.8.2c(ii)

Ref 5.8.3
Sample 3 Textured surface board strata Isle of Skye
Ref 5.8.3a
Fabric sample a) using a range of fabrics from cotton muslin, calico through to linen and jute I wanted to explore changing scales of fabric weave to echo the character where larger stones existed at the top of a soil structure rather than as per norm going down to bedrock. Decided to insert some small pebbles from the reverse
Ref 5.8.3b
Fabric sample b) using a silk noile the concept of obtaining a ruched surface for further stitch work entered into mind, hence the shibori tied pipe on the right of the sample board photo.  Used a range of beads, seeds and string/linen thread to give added texture to the shibori surface.


Sample 4 Textured surface board, Sandstone wall Arbroath Abbey
Ref 5.8.4a
Ref 5.8.4
Fabric sample a) cotton fabric was layered on top of fleece to provide a quilting surface. Having coloured some tyvek with oil pastels I then used a soldering iron to distress the tyvek surface.  This was then machined on to the layered fabric with an outline stitched added below the shaped tyvek before the process was repeated three more times.
Fabric sample b) using a cotton base layer, melted nylon was added before added a distress linen layer where threads had been withdrawn. threads were then knotted to pull threads together. finally knotted threads were added to give additional texture.
Ref 5.8.4b(i)


Ref 5.8.4(iii)

Ref 5.8.4b(ii)


Ref 5.8.5
Sample 5 Textured surface board, conglomerate stone, Lost 'beach', Strathdon

Ref 5.8.5a(i)


Ref 5.8.5a(ii)


Fabric sample a) four layers of cotton and linen fabric were layered together and machine stitched shapes were worked to replicate the relief patter of the rock.  The shapes were then cut away and distressed by rubbing.  The surface was then machine stitched to add interest and depth.


Ref 5.8.5b(i)
Ref 5.8.5b(ii)
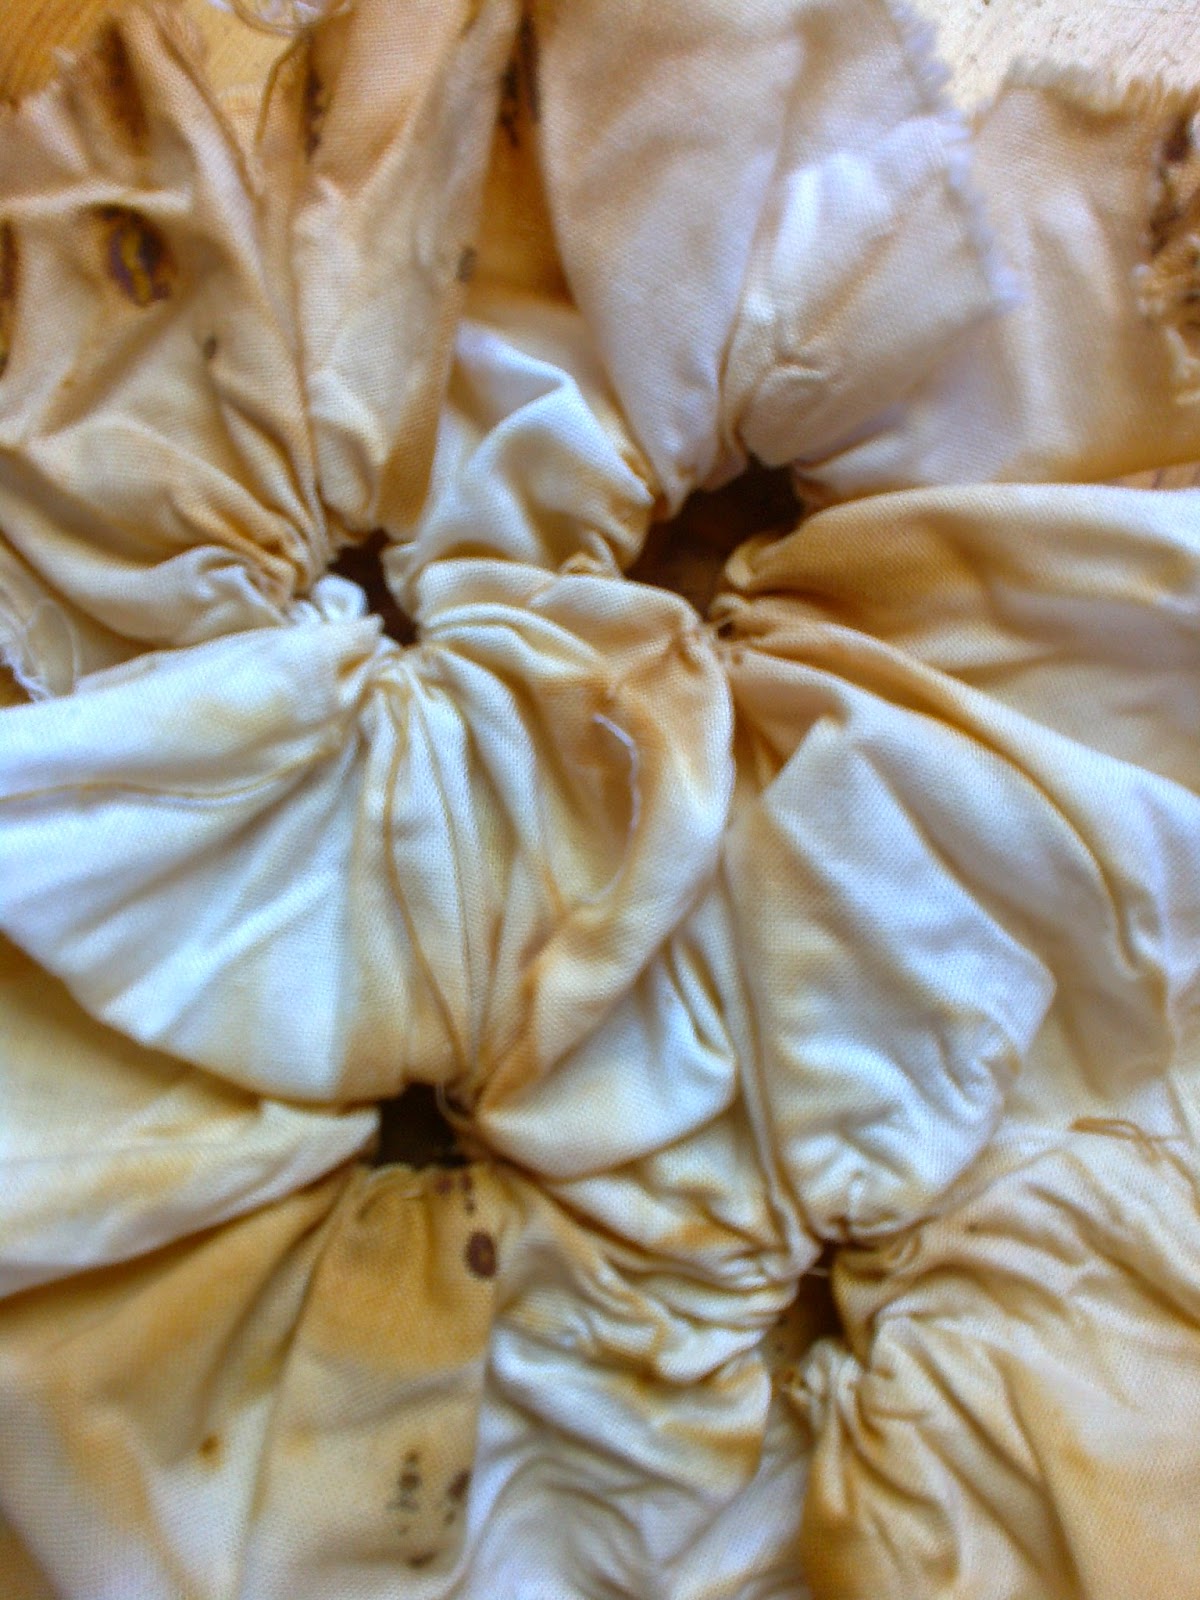
Fabric sample b)  Using some rust dyed calico I replicated the tissue paper samples by gather three circles  by hand. The images show front and back with an additional embossed image.
Ref 5.8.5b (ii)