Tuesday, 25 February 2014

Quilting, padding and stuffing

Preparing the variety of fabrics, for padding and top and bottom layers and the trapped items made my work space look like a rather strange laboratory, with interesting exhibits...the task to make them come together in a way that would move my ideas along into making fabric with a texture that would respond to touch as well as the eye. 

Ref 5.5.1b
Ref 5.5.1a


 For first 'quilt' I went for a traditional design with same cotton cloth top and bottom over a fleece padding.  Machine stitching the quilting lines I then decided to fray the fabric as this was a fabric samples which had not been used in Chapter 4


Ref 5.5.2a
The second machine quilted piece using a silk variegated top thread on a cotton organza fabric again padded with the knitted fleece. Using photos to inspire the shapes or stitch lines for the samples but trying to not be too concerned about a literal translation...


Ref 5.5.3a
Ref 5.5.3b
In these hand quilted wadded pieces two different weights of cotton fabric top and tailed a fleece wadding. A 60 crochet thread was used for the stitching. For sample 5.5.3a  pattern I wanted to vary size of the unquilted sections to try and replicate the idea of layers and strata while keeping a grid like pattern. Ref 5.5.3b


Ref 5.5.4
Ref 5.5.4 sample proceeded to use a variety of threads on muslin over fleece for a more angular sample.  Sadly lost my way - having made a simple pattern once into the stitching went off piste; it must have been the excitement of the Winter Olympics that took my mind away from what I was doing.  


Ref 5.5.5
Ref 5.5.6
For the next two samples the inspiration came from the Broch of Gurness but two different techniques were used.  The initial one 5.5.5 was a random hand stitched quilting stitch whereas 5.5.6 used wooden insets for shape quilting. Sadly my mind was still on wadding  and I failed to read notes correctly and carried on with three layers! The error continues on to sample 5.5.7 when I suddenly realised my error and did a 'rescue' and you will see how some of the wadding has been cut away from the wood sections. For 5.5.7 I trapped some feathers between a layer of net and cream cotton organza and tried to define their shape with hand stitched outlines.
Ref 5.5.7


Ref 5.5.8a
Ref 5.5.8.b
For the padded sample 5.5.8a I decided to alternate the padding in each section, using string (central space), knitting wool (bottom left), thrumbs or waste threads (top), found wool fleece (bottom right) and two sections of cotton fibres. The see through layer of cotton was backed by a coloured polyester fabric to add depth. Picture 5.5.8.b shows the reverse and each of the stuffing contents.

Sample 5.5.9  inspire by my stone/shell from Coral Beach on the Isle of Skye could fall between a shaped or padded exploration using melon pips and a cheese cloth top fabric
Ref 5.5.9b
Ref 5.5.9a


Ref 5.5.10b
Ref 5.5.10a
For cords I have show reverse and front sample 5 5.10 where a twin needle was used to make channels in which pipe cleaners were placed with wide spaces between to allow larger cotton tops for padding.  In pushing the cleaners and padding into the spaces the original clean lines made by the twin needle distorted at the curves, but while it showed up errors in the sewing and turning of a curve with the twin needle I decided to keep the sample as it seemed to enhance a natural element!
Samples 5.5.11 and 12 again explore cording with piping, zig zag and a knotted string in an attempt to replicate the erosion of the  Arbroath Abbey wall

Ref 5.5.12
Ref 5.5.11

For a finale  and following an inspiration regarding tea bags on the Distant Stitch Facebook page, thank you Sian, I looked at my morning mug of tea and thought ...I wonder!!!  The original teabags were square but mine... well they were triangles! So here they are top and bottom which is which? There were a multitude of options that I tried but opted for classic shape.  I have a feeling teabags will become another thing to save as the option of tea dyeing was starting to occupy my natural dyeing tendencies.


Friday, 14 February 2014

Fabric Investigation

Grouping the materials in fabric type small pieces of fabric were placed on grid prior to seeing how they performed in later experiments.  A record was kept on the fabrics and its characteristics and these are recorded beside the description.
COTTON
Ref 5.4.1a
A. muslin - a loose open weave fabric that frays and can be manipulated easily
B. cheesecloth - as with muslin but not so easily frayed
C. printed voile - a close weave with a soft handle that takes printed detail well
D. light weight calico - a cross between cheesecloth and voile with thicker yarns
E. scoured calico - a closer weave than D but similar weight of yarn
F. calico - a closer weave that gives a clear weave pattern
G. lawn - lightweight smooth fabric with see through quality
H. percale - close weave with smooth feel
I. printed cotton- more pronounced weave pattern than percale takes a print well
J. printed calico - a lighter weight than 
K. poplin - a smooth but very close weave that takes digital prints well
Natural
A. Linen natural - a firm even weave fabric that is used for embroidery
B. Linen bleached -  a bleached and more open version of A
C. Jute hessian - rough open weave with slubby yarns
D. Jute scrim - very open flexible weave
Ref 5.4.1b
E. Linen natural fine weave - a closer weave which gives a a lovely fluffy fray   
                                                                                                                  SILK


A. Noil natural - a slubby open weave 'rounded' fabric
B. Organza - a sheer close weave with fine yarns
C. Natural silk - even weave fine yarn with little lustre
D. Light dupon - a sheen but not slubby fabric
E. Habotai - lustre and fine weave
F. Sari ribbons - fine weave with slubs and remnants of different weights
G. Throwster silk ends - a compact rod that pulls out into fibrous surface


Ref  5.4.1c
MANMADE
A. Felt - soft, surface with no visible weave and difficult to fray but fibres can be teased
B. Fleece-  soft and more flexible than felt
C. Adhesive vilene - flexible fabric which can be pulled without losing shape, adhesive spots that melt on heat on one side
D. Polyester/viscose face wipe - soft malleable fabric
E. Tyvek - visible, soft but tough structure which belies its character when heated
F. Nylon lace - open weave and design which is flexible and decorative
G. Nylon - opaque, even weave with yarns that are long
H. Nylon organza - sheer open weave fabric with high sheen, soft and malleable
I. Jersey nylon - distinctive knitted surface which stretches
J. Lace *  heat test seemed to proved this piece was in fact a natural fibre
K. Nets- different weights of net which don't fray but are malleable.

The task was to then take a closer look at the edges and see how to translate and explore the characteristic of the fabric into decorative edges.  Looking again at the detail in my photos the ideas that came to mind were:  jagged, soften, erode but before these I realised that the selvedges of the materials were in themselves interesting.

SELVEDGE, photo: strata image from previous chapter 5.3.2. Selvedge described in the dictionary as, 'as a woven edge that stops fraying' set me thinking.   Taking the original strata photo for inspiration and then blowing it up the following observations were made.  The selvedges proved not only interesting in how they were made but how they curled  and when the material was torn away from the edge how the torn edges reacted against a firm edge.

Ref 5.4.2
Top item blow up of section of strata photo  from 5.3.2
14 hole canvas selvedge
Cotton showing tenter hook detail
Torn edge formed a 'stepped' selvedge on silk
This fleece edge curled and again tenter hook holes can be seen
folded over this torn selvedge edge of silk
Elastic 'selvedge' and torn lace
This lace ribbon had two different 'selvedges' and again the tear proves interesting

Ref  5.4.3


JAGGED, photo the rocks from Mull of Kintyre( ref 5.2.2) top right side
tear, fray, snip, pinked, vent:
A. Cotton poplin torn and opened
B. Linen frayed and snipped top edge, frayed and knotted bottom
C. Fleece straight snipped and twisted
D. Cotton angled snip and twisted
E. Two weights of cotton pinked and place over each other
F. Silk noil

Ref 5.4.4
SOFTEN, photo: lichen stone from Broch of Gurness (ref 5.2.3) bottom right side. curve, scallop, twist, knot, gather
A. Nylon lace
B. Net twist 
C. Net twist and knot
D. Fleece knotted
E. Cotton twist and loop
F. chenille wire curved
G. Linen cut curve and frayed
H. Cotton gathered on edge and in middle

ERODE, photo: Arbroath Abbey wall, central detail.
Ref 5.4.5
burn, sear, melt, hole, wear away
A. Silk 
B. Lace
C. Cotton
D. cotton muslin
E. Face wipe, polyester and viscose
F. Nylon
G. Nylon lace
H. Sari 
I. Nylon net
J. Tyvek
K. Nylon spot net
L.  Nylon spandex
The heat tests were done with a two sizes of soldering irons and a candle.  The soldering irons were easier to handle but the candle flame made it interesting to see what happened relatively quickly! Good caution in Module notes to have a water bucket close at hand.  Slowly lowering fabric onto the flame proved more manageable than approaching from the side.  The character of the face wipes, sample E, where amongst the most rewarding of the samples  -soldering iron opened up fabric but didn't destroy the fibrous nature and the candle burn produced globules.  Tyvek, sample J, an addictive performance with heat as it moves, melts and opens up into holes but the open stiff net , sample I, proved more manageable with the soldering iron.  I only had a small piece of nylon spandex and pulled it onto a bias and soldered it in sample L.


Sunday, 2 February 2014

Texture and relief in paper.

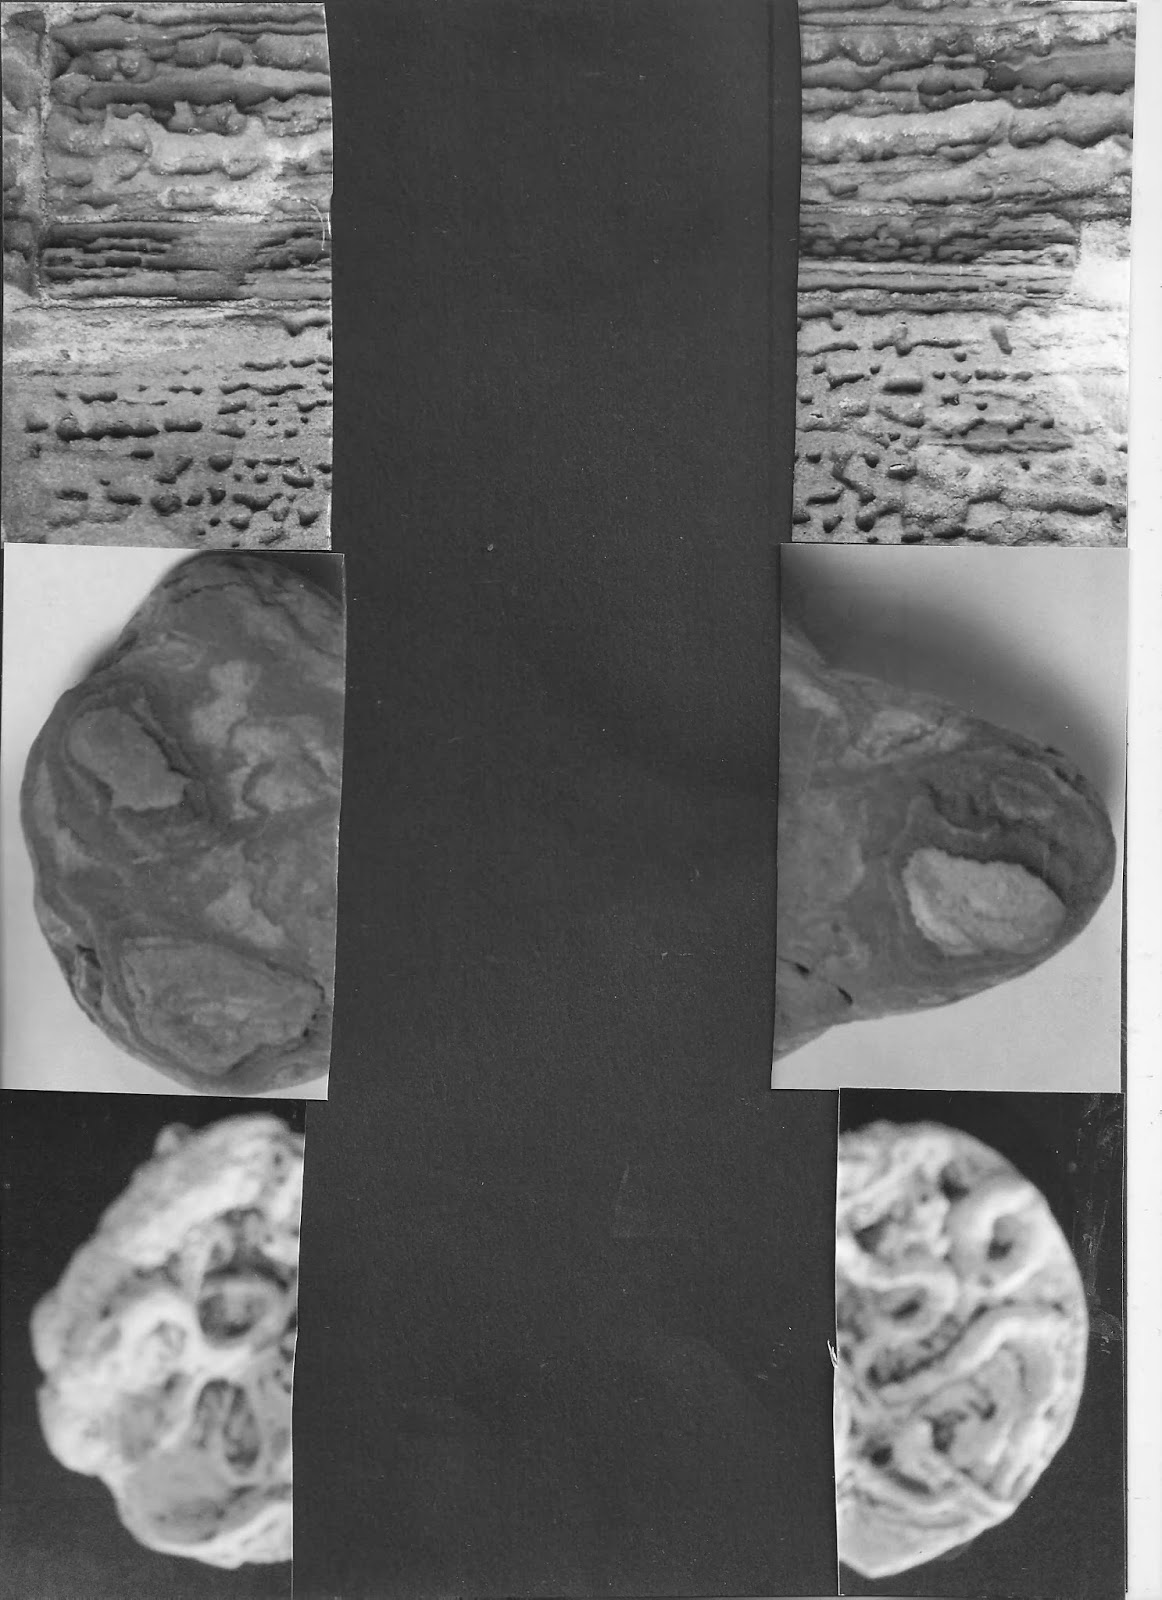
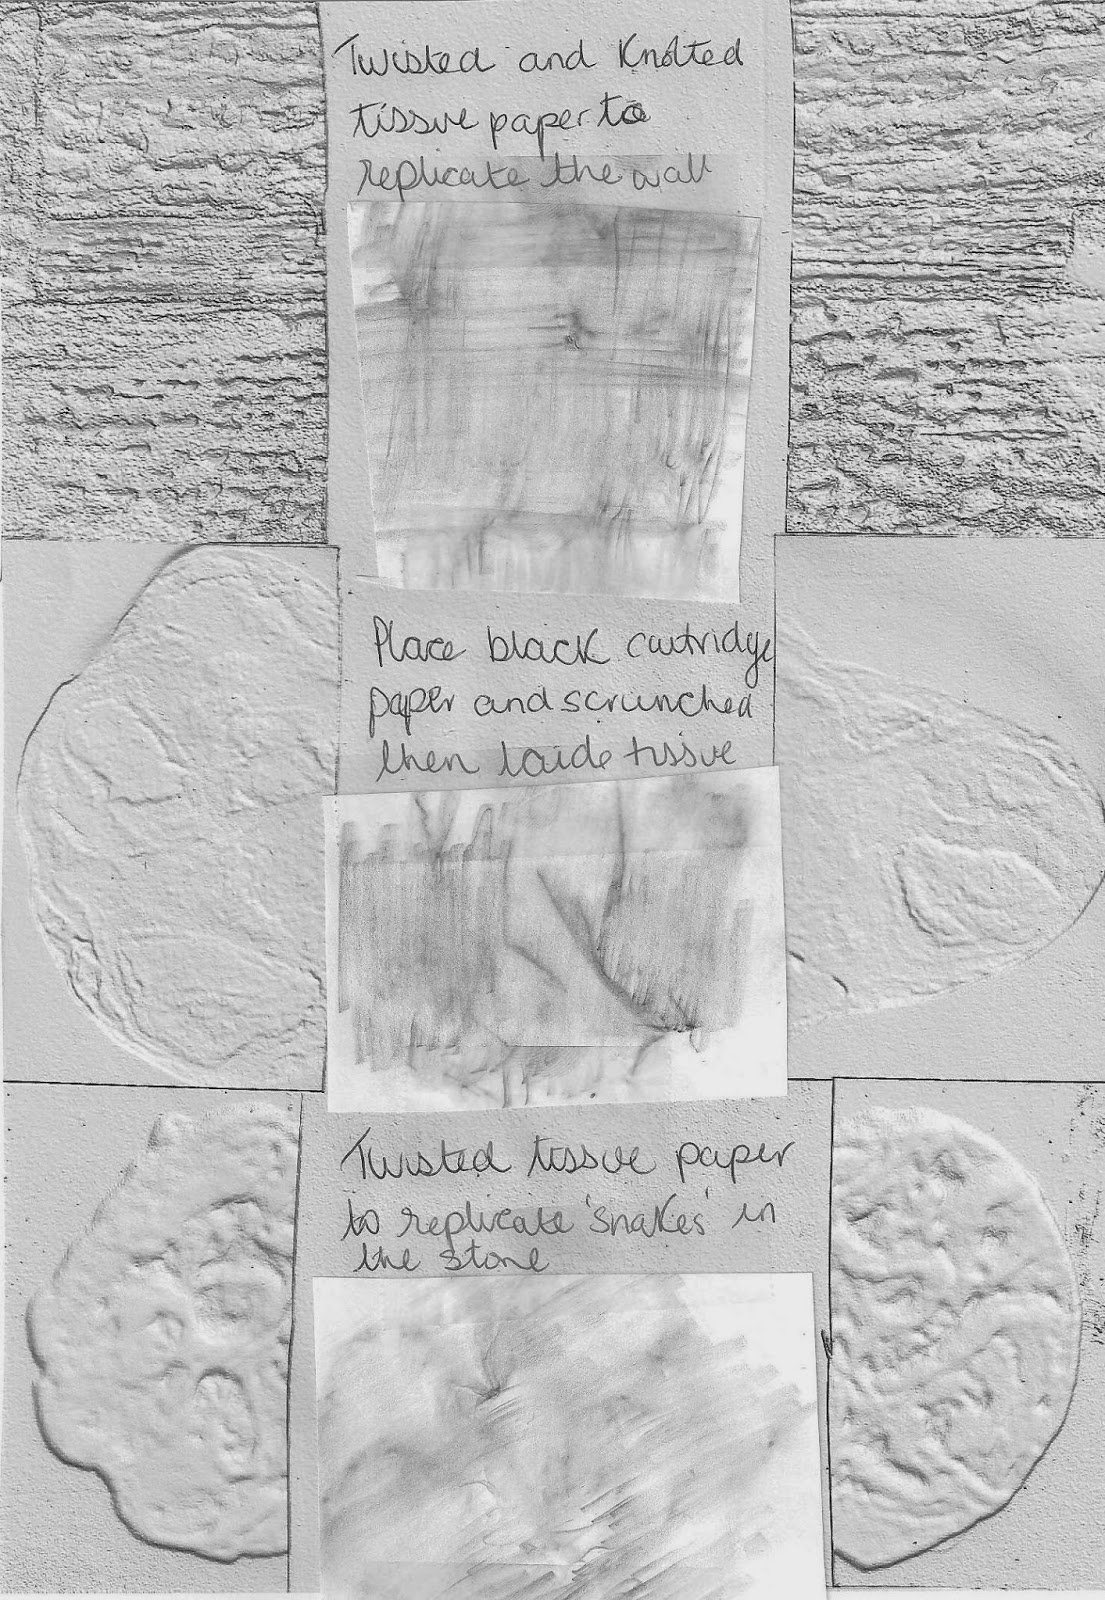
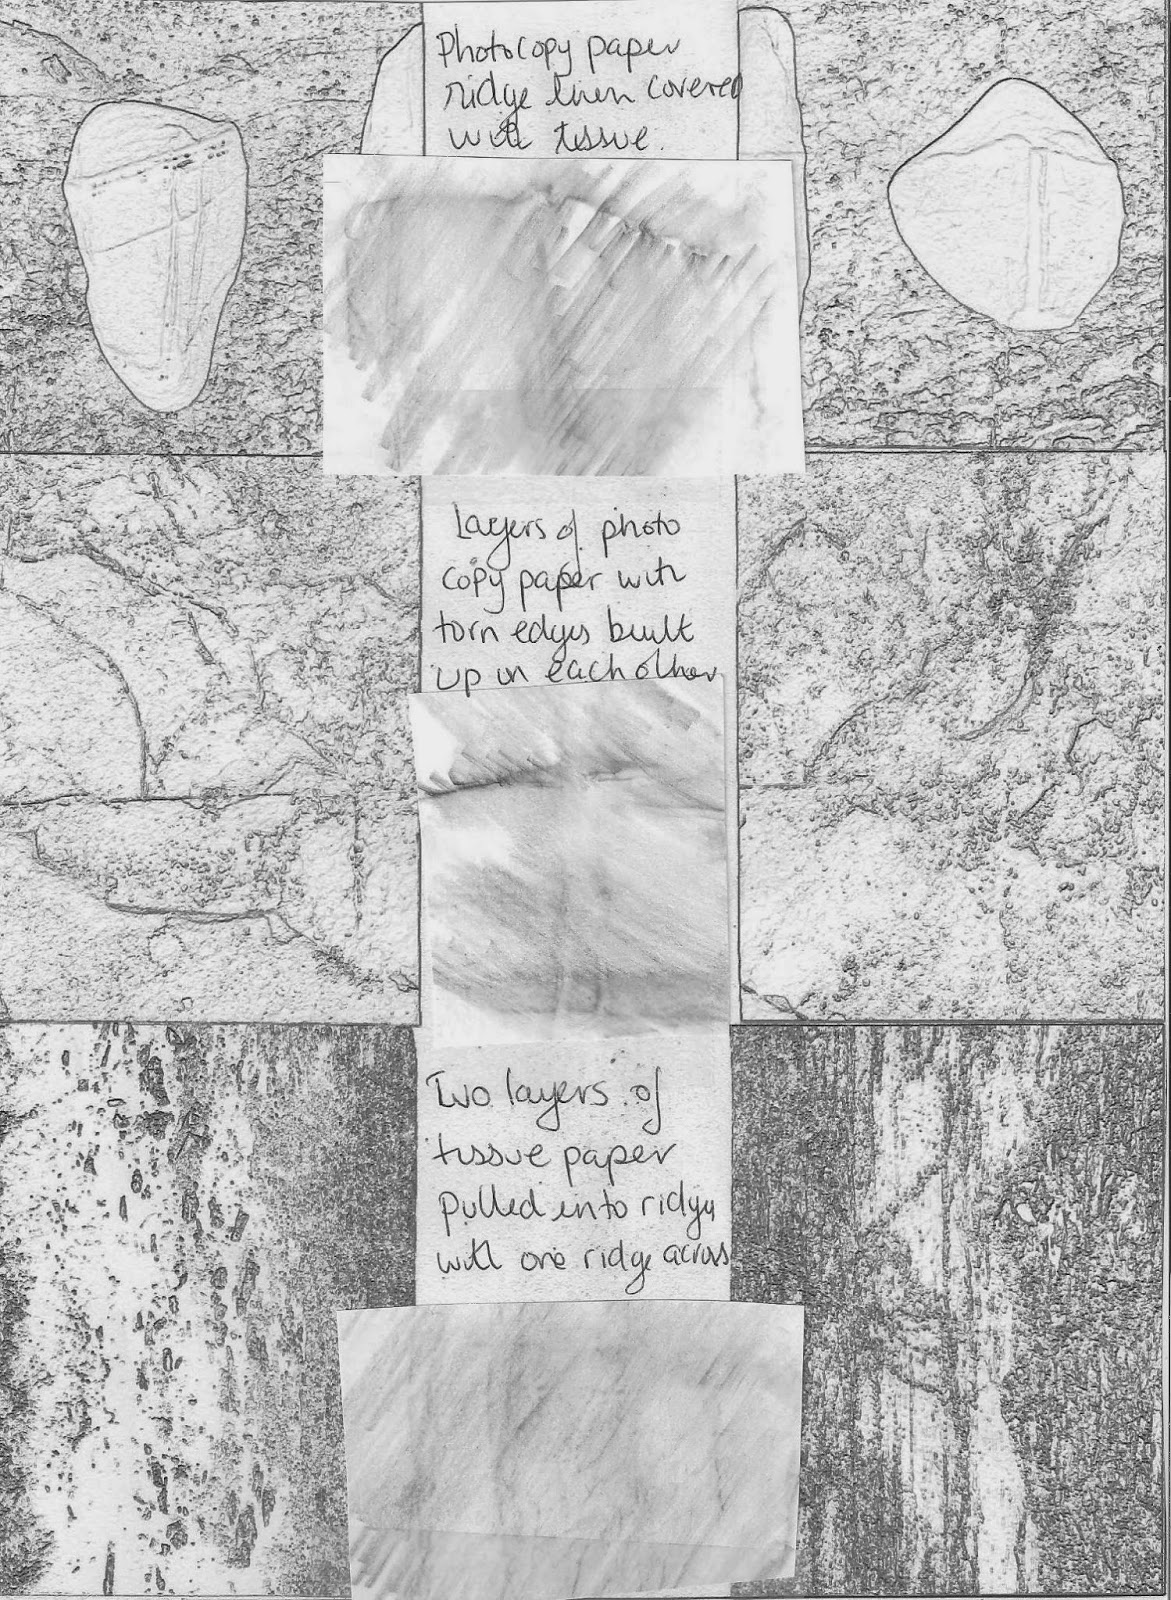
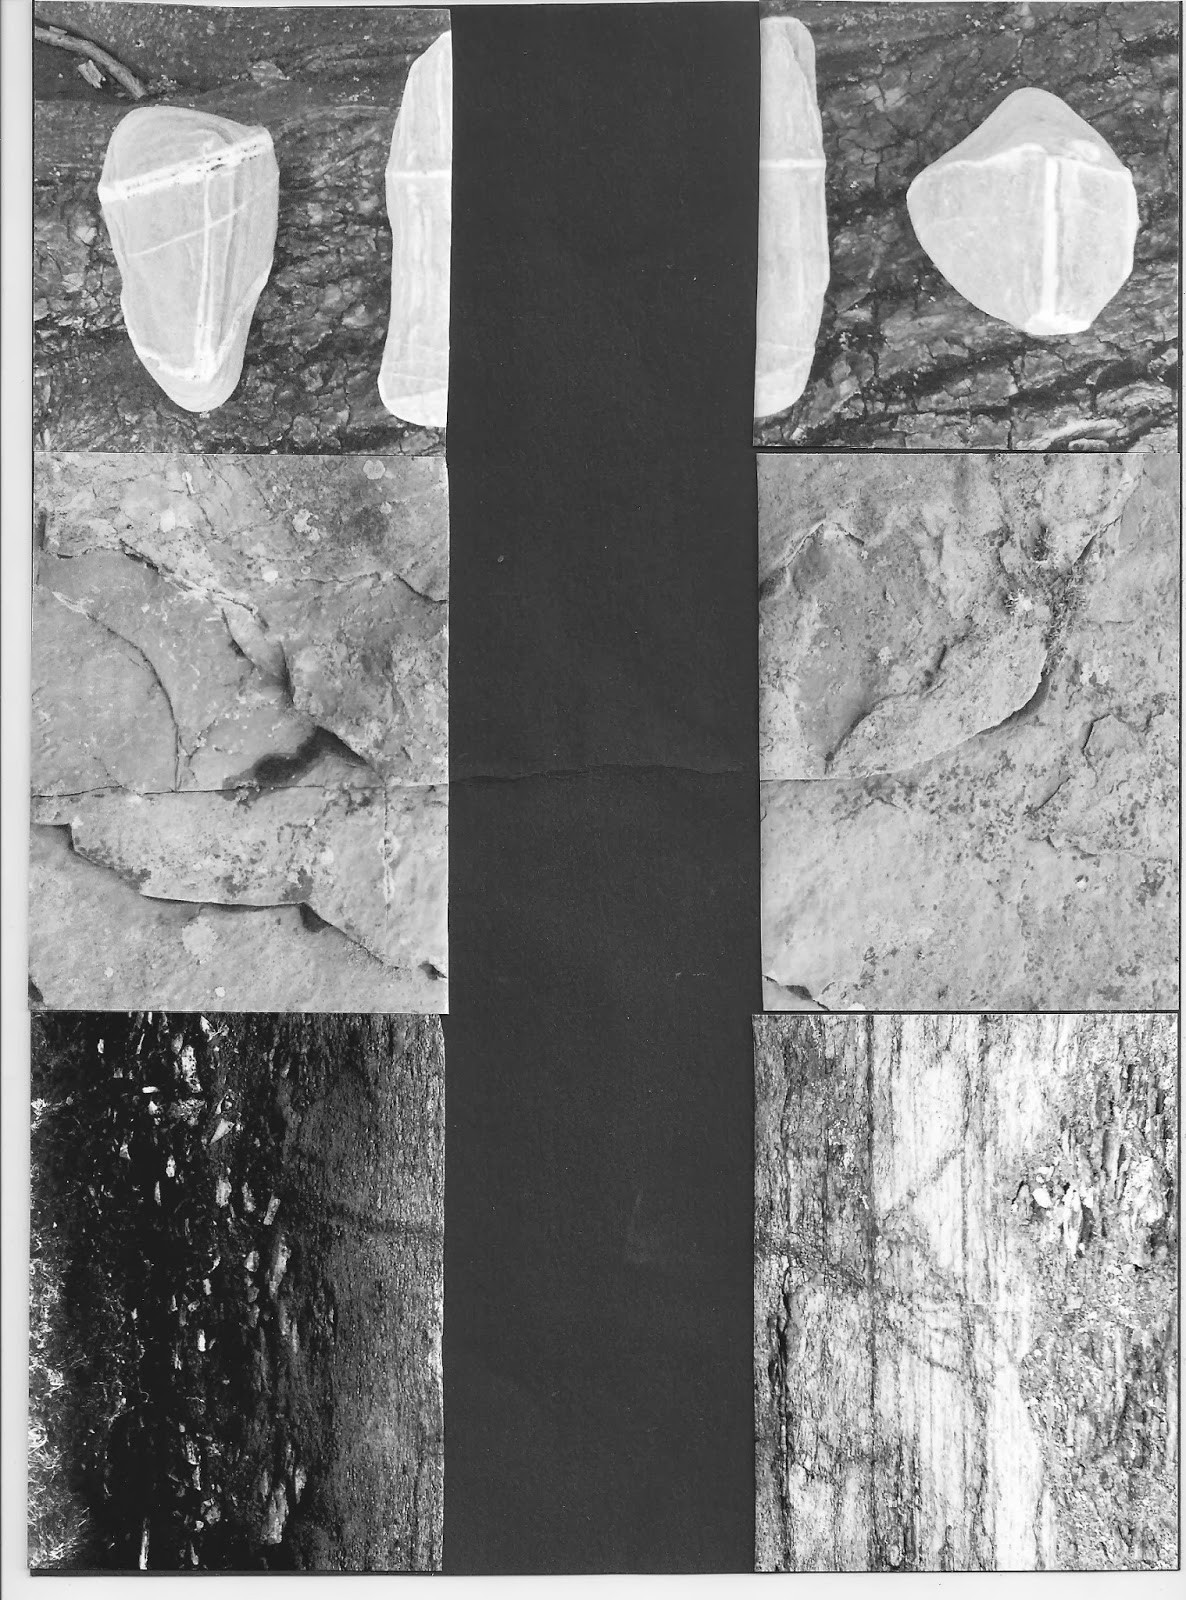
Started this chapter by selecting 6 photos, cutting them in half and mounting on black paper to provide a focus for textural sampling.  Before doing the sampling mounted images were fed into my Gimp computer programme to get a black and white image by using the 'Distort' and 'Emboss' options.
Ref 5.3.1a
Ref 5.3.1b
Ref 5.3.1c
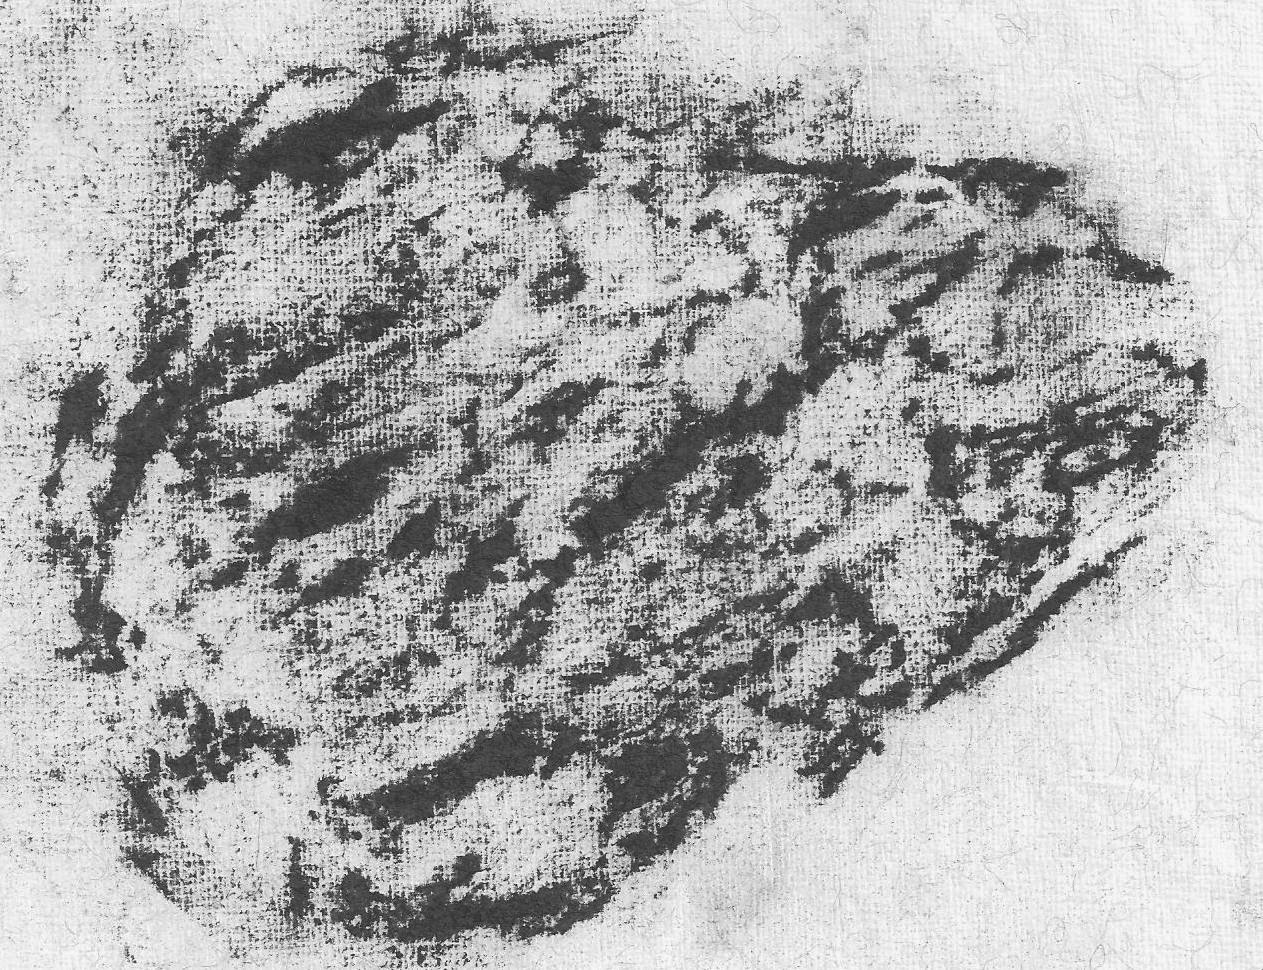
Ref 5.3.1d
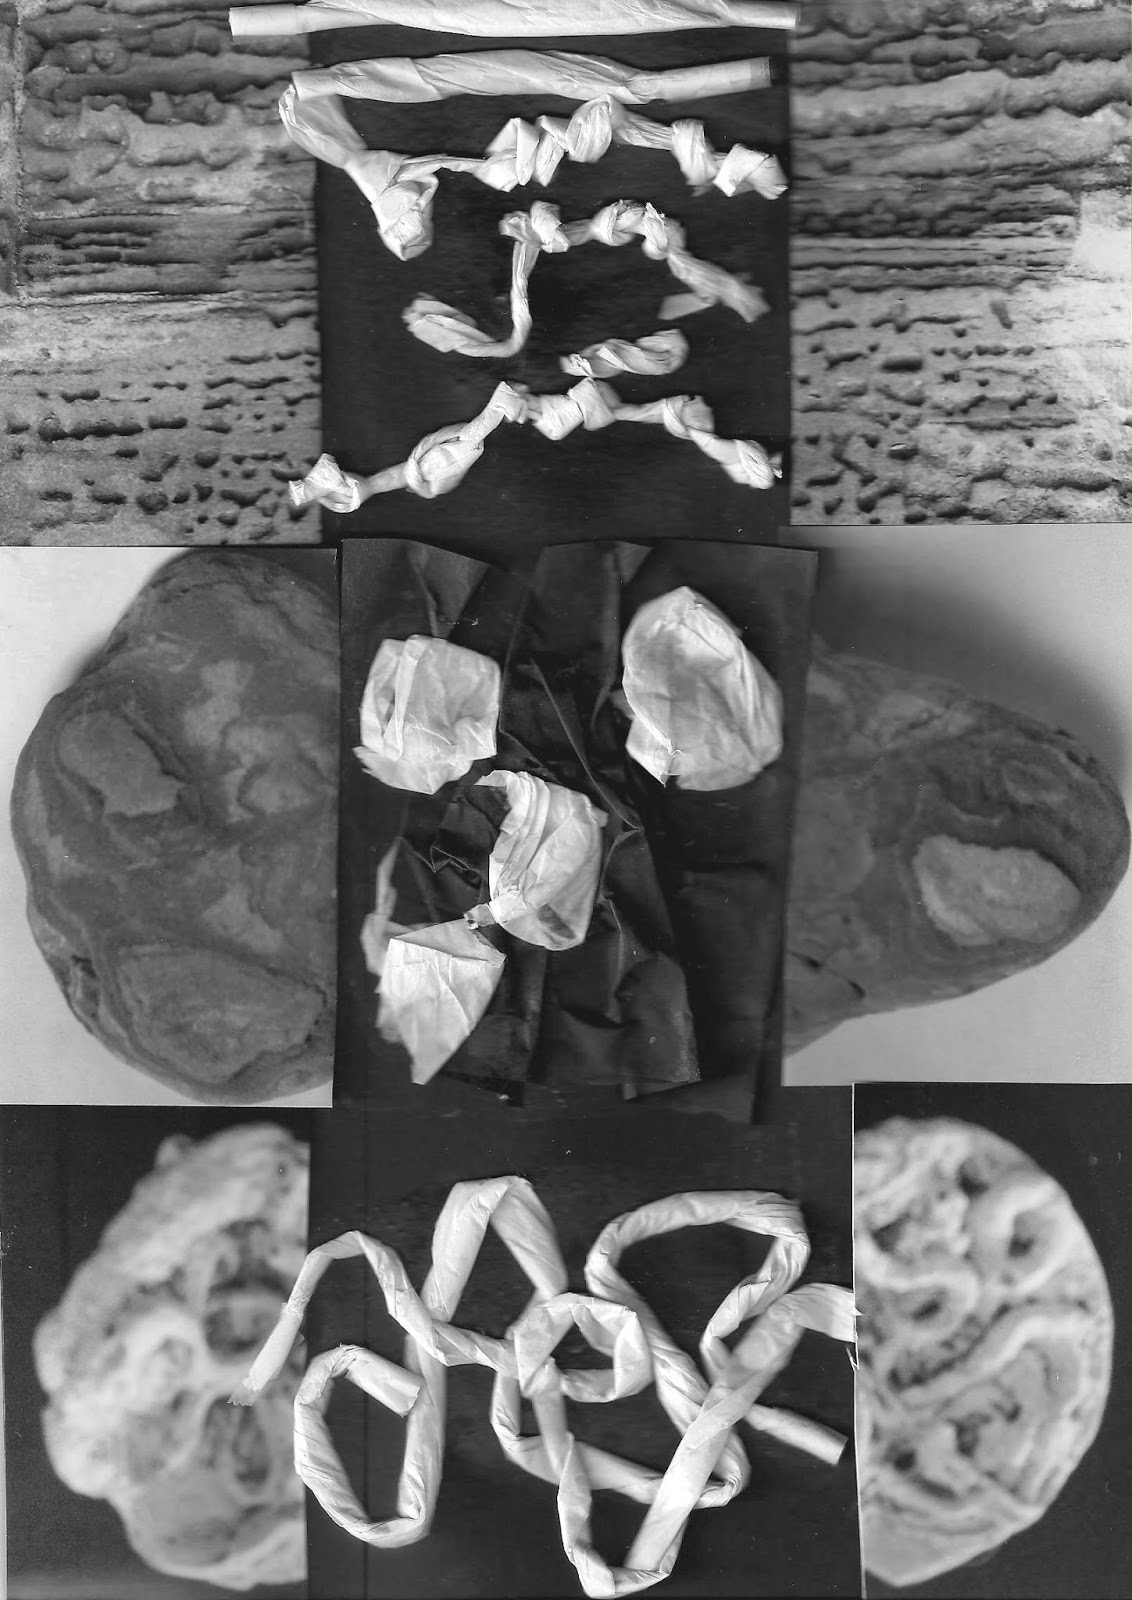
The centre image 5.3.1b shows the paper and method used and also includes pencil rubbings of the paper relief.  Below, ref 5.3.1d is a rubbing of the actual stone used on the middle photo. The rubbing was on textured paper with a crayon. A later chapter goes into rubbings in more detail but thought it good to start experimenting early as there are such a huge range of papers and pencils/crayons and its good to see what makes an effective rubbing.  I was intrigued with the distort, embossed image as it seemed to pronounce the negative relief when the object was on a light background and raise different layers on a black background

Ref 5.3.2b
Ref 5.3.2a


Using the same method as for sample 1a, above, the cut photographic images were in colour and those have been kept in my sketch book but for the purpose of the blog they are saved in greyscale.  The colours were muted and I wanted to keep a record of the natural tones as the greyscale lost some of that subtlety.
Ref 5.3.2c
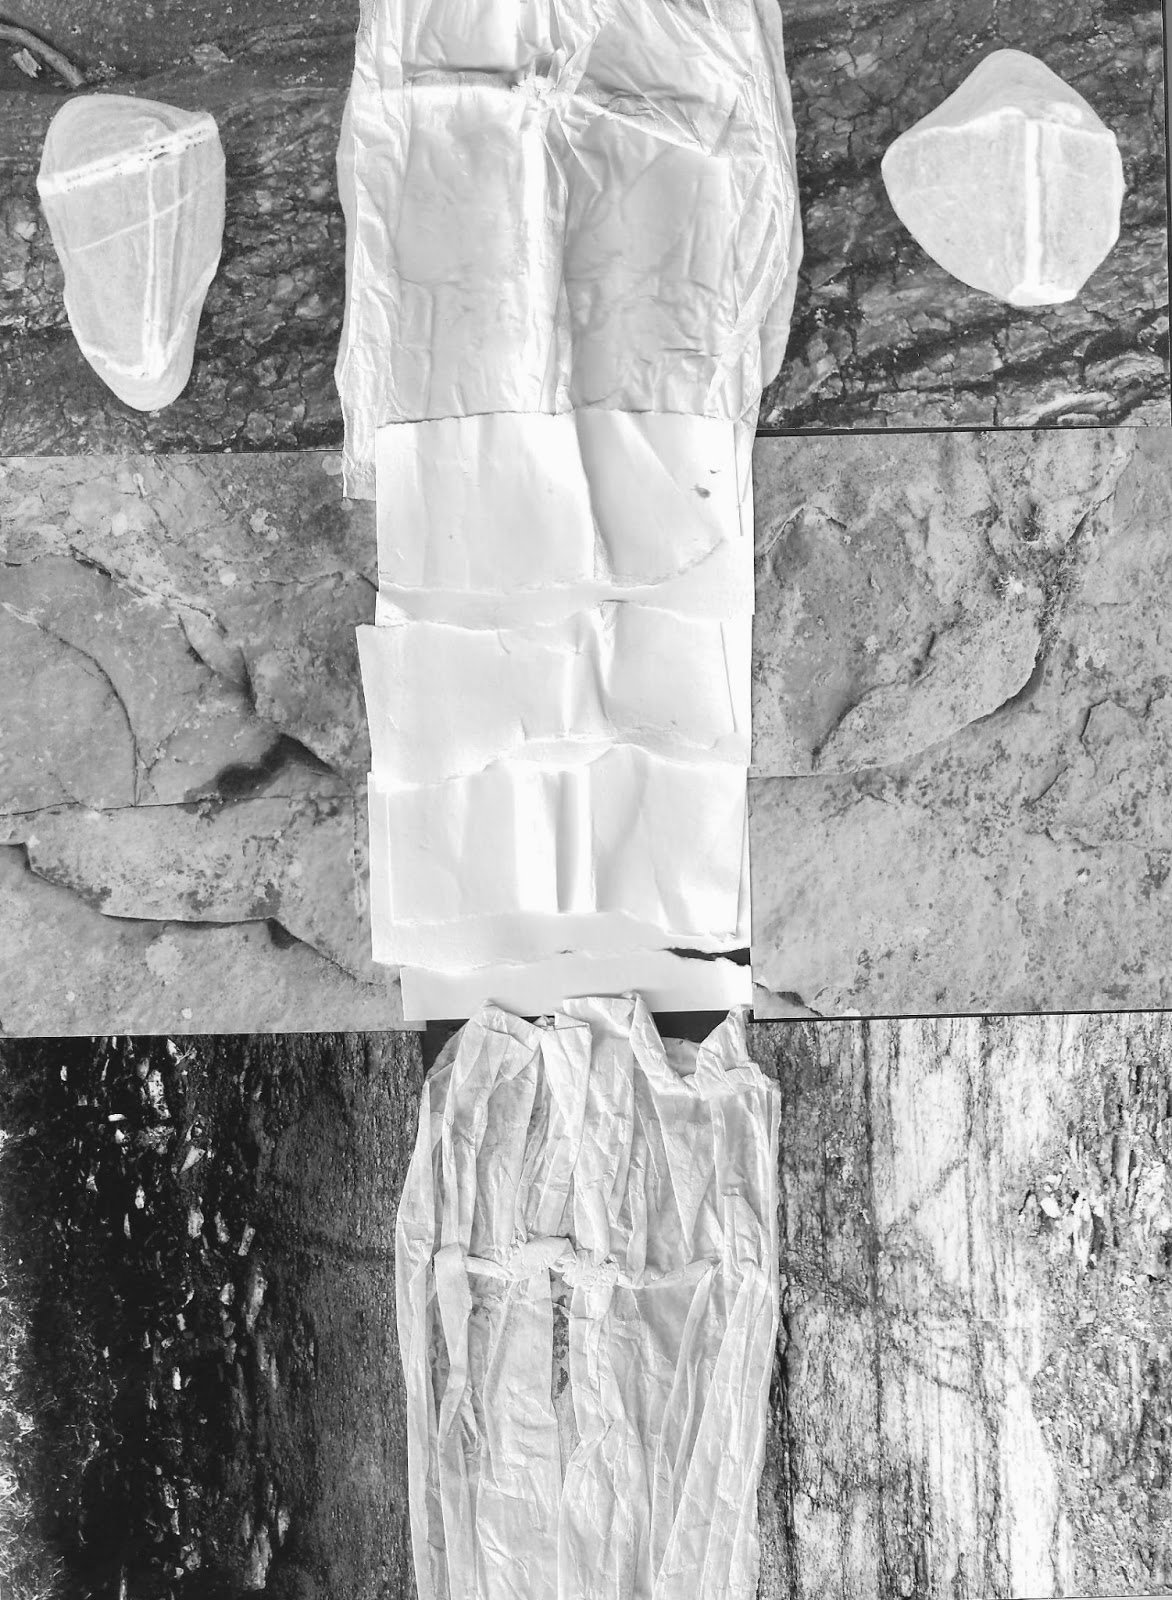
For later consideration feel some of these images could be played with more.  Although the centre and bottom image of 5.3.2c have been turned on their side, there could be more mileage in chopping up images and enlarging sections, particularly when looking at stitching patterns...have inserted a little reminder , TEC, in workbook and on my story board! Turn, Enlarge Chop! The idea of soil, strata, stone that came from Chapter 1 shows a similarity in this sequence of papers with merely a change in scale of the original photo and type of paper used. Sian had observed from photos in Chapter 1 how, 'the long view, often reflects the close up view such as those of microscopic views...'

I have found that while you set about a new chapter you suddenly become alert to all things that have a 'connection' with what you are studying.  So imagine my delight when I noticed a project that was initially shown on BBC Scotland website  http://www.bbc.co.uk/news/uk-scotland-25916408.
University of Abertay shows a longer interview.  The idea that a soil sample can be translated into a 3D piece makes me wonder how to get a 3D printer or should that really be my task to replicate in a resolved sample for this  Module? Don't hold your breath I am sure some other simpler ideas will crop up with the intervening nine chapters!!!!

Wednesday, 22 January 2014

Exploring textures with papers

The different textures of the papers were  in themselves interesting before pleating, scrunching, ripping and folding.  Took notes on the 'feel' as much as the look and described the ease or difficulty in getting the paper to take the technique.  In some cases I  have taken a rubbing. 
Using the same 12 papers throughout each exercise I put them on a grid around a photo from the master board.  The idea of the grid is to allow different images to be interchanged over later chapters to see if improvements can be made or new techniques added. 
The papers 
top row: top left; Lokta paper, next; tyvek(does this qualify as paper or fabric?) next; fine tissue paper, right; 3 ply face tissue
second row: left; fine vilene, right(does this qualify as paper or fabric?) ; tracing paper
third row:left; greaseproof paper, right; printed 80grm copier paper
bottom row: left; packing tissue paper,next; HP photo paper, next; kitchen roll, right;
wrapping paper.

First a bit of tearing and ripping- the photo the King's footprint at Dunadd near Kilmartin, Argyll.
Results:
Ref 5.2.1
The tearing of each type of paper offered a wider range of finishes than I had imagined.  The fibrous edges of the vilene, tyvek, lokta paper and facial tissues were more pronounced than all the other papers.   A rather pleasing effect that is shown more easily on the photo paper than on the Lokta paper  and copier paper is the how the edges peel of the surface giving a mini 3D effect to the edge, the tracing and greaseproof paper gives a similar effect when layering the pieces on top of each other. PS In writing up the results realise the greaseproof paper and tracing paper images have been transposed!

Then pleating and folding - the photo granite folds on west coast of Mull of Kintyre
Ref 5.2.2
Results: Folding, pleating and fanning out some of the results of the papers produced ridges and vents that would possible be better held by stitch than by glue. The vilene, tyvek and tissues were more malleable and gave softer effects but I was pleased to see how the photo and copier paper seemed to fold easily into different directions.  On reflection the fact they had an image on them encouraged you to follow the pictures direction!

and last a scrunch - the photo here is the lichen detail on stone at Broch of Gurness
Ref 5.2.3
Results:Taking the same size of each paper, except the photo paper,which was 4 x 6inches the papers where stuck onto a glued square and then eased the papers into the centre with my fingers the easiest was the three ply face tissue the most difficult the photo. But I liked each of the qualities they gave one layering the other a more angular structure that moved and expanded. The fine tissue compare to the greaseproof and tracing paper was easier to manipulate but the greaseproof gave greater volume and the tracing paper a more crunchy and creased effect.  The vilene, Lokta and packing tissue paper and tyvek had a soft handle and enjoyed the shapes they made with relative ease.  The A4 copy paper and wrapping paper had a stiffness  but creased and made interesting shapes that could be pulled out and manipulated without tearing.
Manipulating Tissue
Selecting the fine tissue paper for this exercise I was interested to see how the company logo that was stamped through it would effect the results.  The transparency of the paper had  led me to feel that it would be more suited to reflecting watery images rather than stony, earth strata so here goes!

Ref 5.2.5
Began by winding and  knotting the tissue on the top row and was quite please that the middle sample kept the 'wind' in with out knotting and allowed rounded curves- it took quite a lot of paper to achieve the effect. I noted that part of our materials list mentioned pipe cleaners - that may allow even more movement and use less paper.  But kept to just using papers for this chapter. The 'bow tie', on top right, could be a sample to rub to get the texture rather than the rather artificial effect of the knot.
The middle row of samples looks at layers and gradual lose of transparency with the central  sample looking at turned over rather than rough or cut edges and the next sample considers weaving and angular edges. 
Ref 5.2.6
The bottom row shows pleating with the one on the left showing an effort to pleat on horizontal and then vertical line - it was difficult to keep the first row of pleats in and work on pleats in a 90 degree angle-perhaps stitching on fabric would achieve a better result.  However did try this technique on the packing tissue, see bottom of 5.2.6 sample board and it seemed to work better and could be of use for another rubbing.  The rest of the samples show a fanning out of a pleated shape and leaving some edges unglued to layer up paper. 
For 5.2.6 I pleated the tissue, perhaps I should do narrower pleating but in the stitching put the cotton through at different depths.  I also did a smocking stitch which had a better effect on the reverse than the front.  The front looked to 'stiff' but back gave a more hollowed effect, it was even better when I squashed it (thanks Meg for your tips on Facebook).Ref 5.2.6
a) 'right' side                                                                     b) 'wrong' side                                                        c) changing depth of stitch


Tuesday, 14 January 2014

Texture in Landscape

Landscape. 
The header for this Module is a landscape that I love, the North coast of Scotland, Melness Bay, Tongue in view of a wonderful mountain, Ben Hope.  What is so special is not only all the elements of the landscape sea, sky, sun, water, sand, stone and wood but the evidence of human endeavour and adventure.
What an incredible subject this Module offers for exploration, just where do you start?  Having been told to hone on a key area  I first wanted to consider the four fundamental elements AIR, WATER, EARTH and FIRE  to focus onto photos and research books that whetted my appetite.  I started with a look at the master of overview, Bernhard Edmaier.  His wonderful panoramic shots have always inspire me and his book, Patterns of the Earth, Phaidon is well thumbed.
http://www.bernhard-edmaier.de/en/fine-art.html Earth, water and fire


For the 'air' photo I have choose a picture of Ben Hope with the clouds or 'wave bars' that I took on the day after the picture used  for the header to Module 5

Then setting out a story board I contemplated which element held the most attraction.  A large print was taken of each element as well a smaller photo which were colour intensified

Earth, top left, shows the strata detail from topsoil through stone, mud, sand and the detail of a tree root !
Fire, top right shows the burnt heather  pattern marks on hills
Air, bottom left, shows the potential of cloud study
Water, bottom right shows the pattern of the bottom as well as the ripples
Then added key ideas that came to mind for each element:

Ref Coral beach Skye, detail
Ref Coral beach, Skye
Having concluded that Earth had been formed by fire, air and water thought it appropriate. I had enjoyed my initial course with Distant Stitch where I had worked on a stone wall ...ideas from that are still occupying my imagination on the link between humans and place.  But  for now I wanted to explore the texture of soil, strata and stone. Now some 'starter' examples.  


Ref Ideas sheet

Ref Ring of Brodgar detail
Ref Ring of Brodgar Landscape
Some of the photos show location and detail, some just detail which in fact can be enlarged in further chapters to obtain more textural context for work. 
Ref Arbroath Abbey 
Ref Arbroath Abbey wall


As well as natural views I have also included photos of Ring of Brodgar, Broch of Gurness and Arbroath Abbey which are signs of humans being touched by the texture of the landscape and  making their own marks.  

 My own collection of stones picked up on walks:
Ref 5.1.a
Ref 5.1.b
Ref 5.1.c
Ref.5.1.d


Ref 5.1.e