Sunday, 10 June 2012

Traditional piecing methods

Looking back over my inspiration boards I worked some ideas out on rough paper.  The thought of using up 'precious' hand made paper samples caused me to pause before having the confidence to cut! It was at this point that I also chose to print copies of the printed fabrics thereby having a stash of papers.  I began to get the feeling that I may well be printing more fabrics that more closely replicated the paper samples or maybe photocopy the papers and print them!!
Ref Page 44
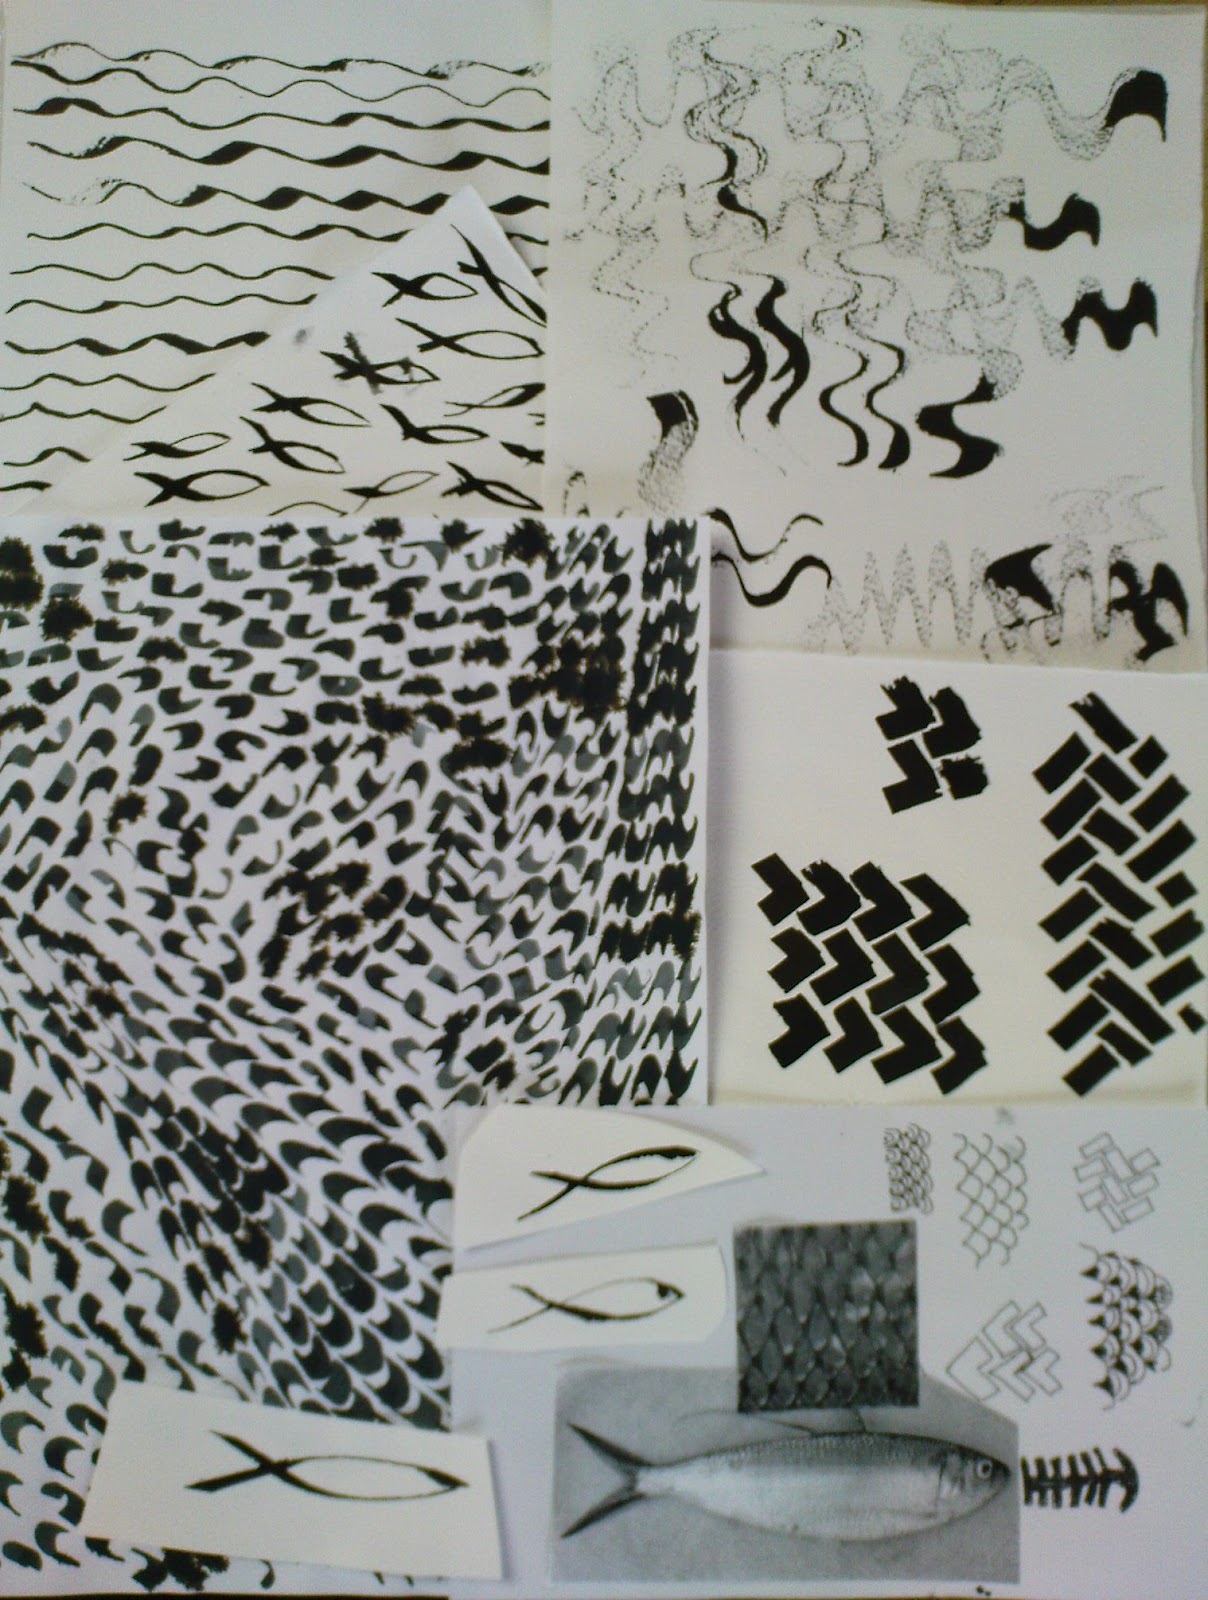
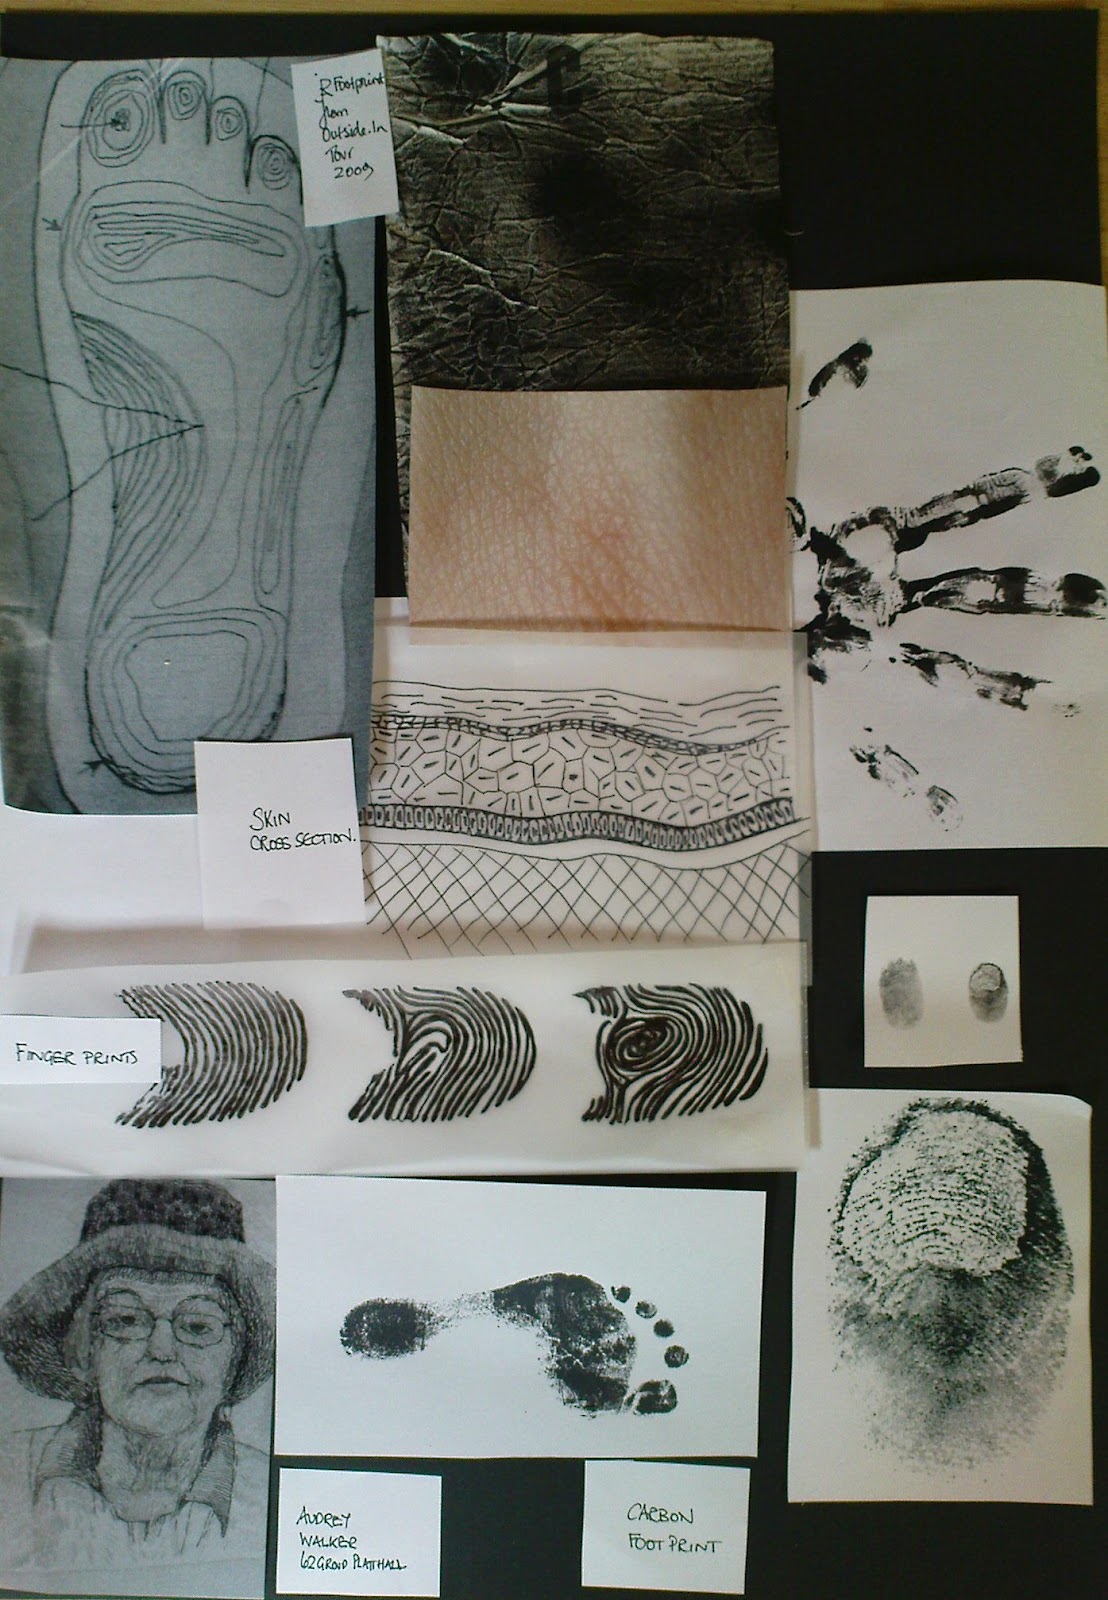
The papers that were selected to work an idea were from the range of feather, fish, amphibian and skin papers. When deciding to select a pattern to work with sample c) seemed to offer the best choice.  Sample b), the ammonite, could well be better  for use when looking at the Fibonacci sequence in a later chapter.
 Originally setting out to do a different sequence to that shown on page 44 I decided to also try the reverse using the full square rather than cutting off the corners as shown in page 44 sample c). Samples on page 45 show design using log cabin technique.
Ref Page 45 sample                                             Ref Page 45 sample b)            Ref 45 sample c) For the sewn sample c)  a range of bought fabrics
 
Working with strips of paper sequences were used to experiment with the technique of Seminole patchwork.  First working through the sequence with bought pattern papers :
Ref page 46 sample a) and ref page 46 sample b)
Progressing onto making a sample in hand printed papers using a range of cuts before deciding on the two following options of cut; 90 degree for main body and 45degree for fringe these appeared to have a 3D effect and could incorporate some see through and textural aspects.
Ref page 47 sample a)
Now the fun begins in fabric! Determined to keep to a plan - what happens! I contemplate that I should try a sample using just a 45 degree angle, not so much cutting and resewing!
In cutting off the sides as show on paper sample on page 44, a fledgling appeared!
Ref page 48 sample a) front             Ref Page 48 sample b) reverse
 Then guilt set in and back to the original plan.
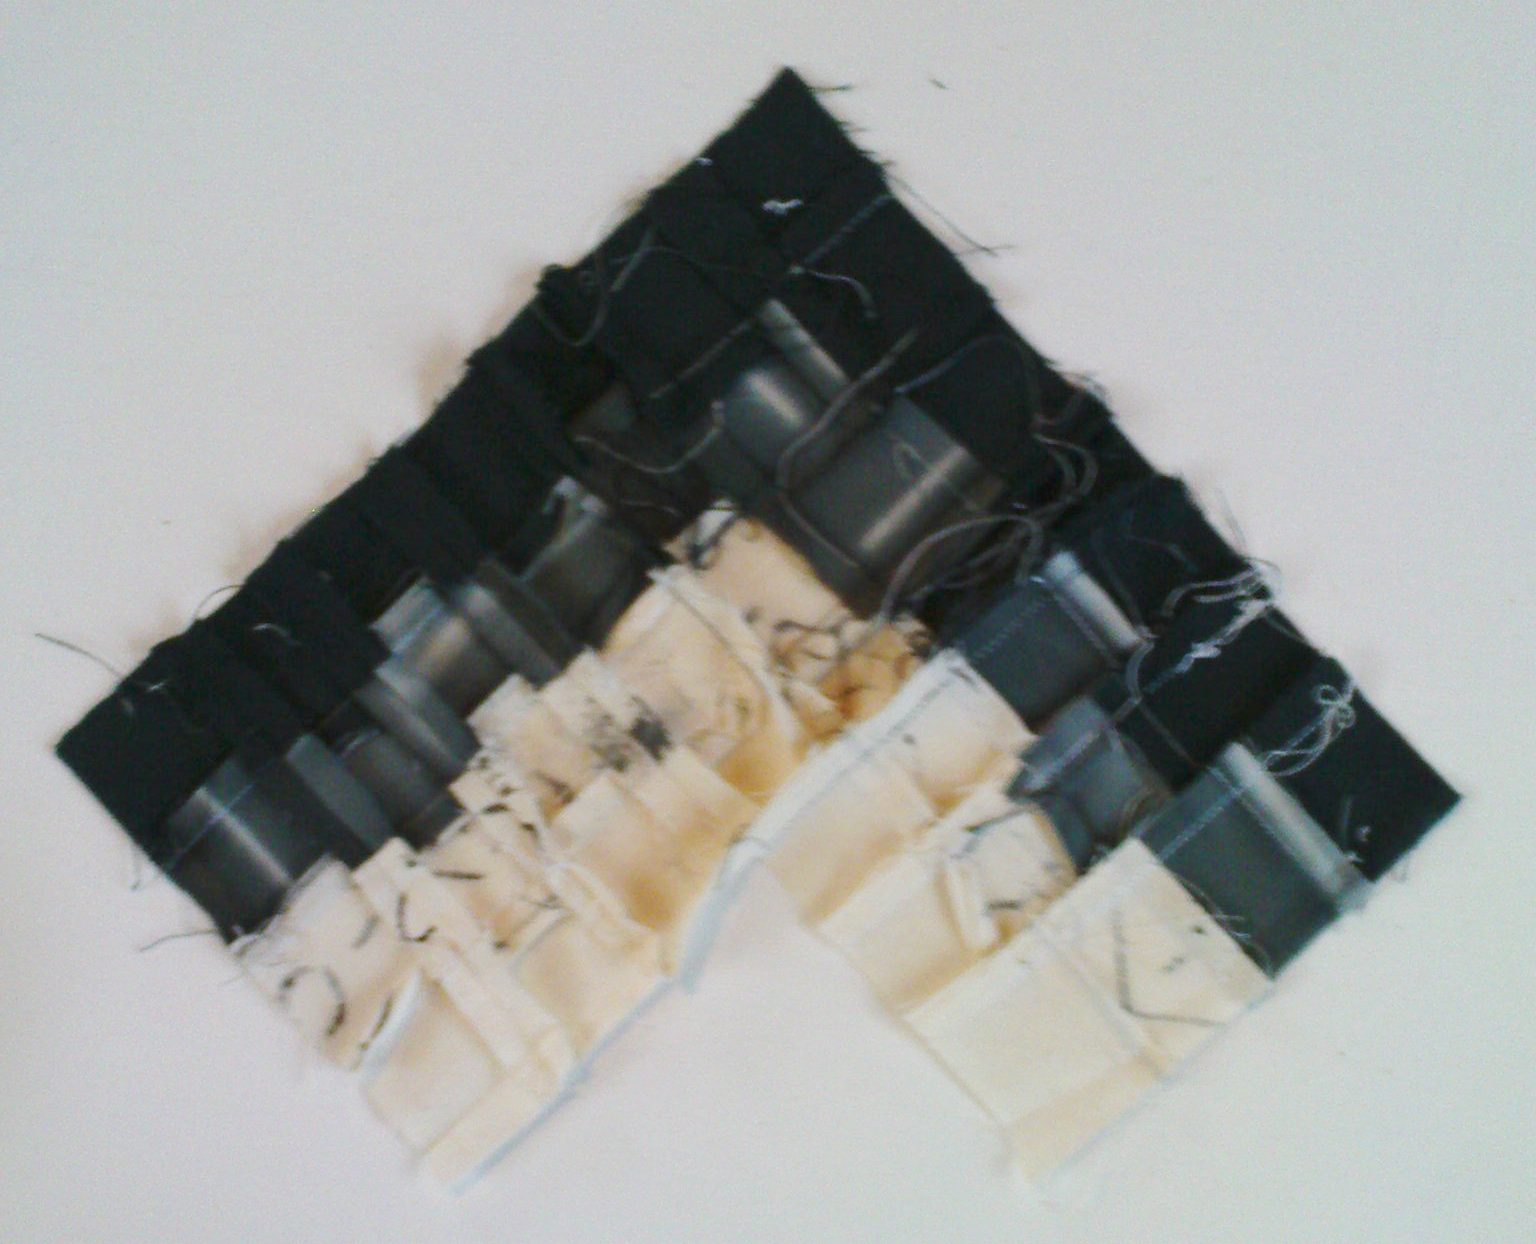
Ref page 48 sample c) reverse                                 Ref page 48 d) front
As you can see a bit wobbly and confessions - this is the second attempt!  Made some strong recommendations to myself that when doing precision sewing; pin at right angles any matching seams and make sure you keep to a straight line to the end of a seam, it seems I have a tendency to wobble at the end and the effect multiples as the piece grows.  Feel somehow that the back is the more interesting image as it doesn't focus on perfection!!
Ref Page 48 sample e) bondaweb and chiffon scarf Ref Page 48 sample f) machine sewn on soluble fabric ( not dissolved)
Made up some fabrics from my 'thrum' jar with an idea for using them to make the insert or fringe.  It took a lot of playing to come up with a result which is sadly a bit of a mish mash...looked great on paper.  Maybe I should have just butted up the seams and over lock to get same effect as paper sample! In trying to tidy up top edge have exaggerated the wobbly edge
 Ref Page 49 Full view on left more detail right
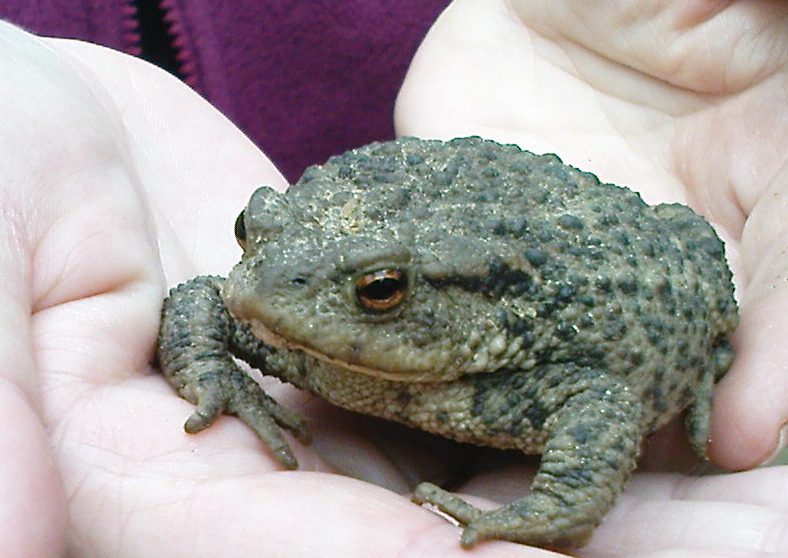
The ideas of how this could be made into a repeat pattern became intriguing but decided that as there was more piecing to come in future chapters would let my thoughts quietly mull over the lessons I had learnt. My inspiration board seems to have become a 'bird table';  an old wood block of a paisley pattern which sits on my window sill and had been used as a print suddenly became a birds wing, a tern that was machine stitched years ago suddenly appeared maybe its time to explore a new animal theme:

Hey presto I decided to iron my fabrics and discovered not only great colours but ... shells!

Thursday, 10 May 2012

Making patterns and bleached patterned papers

The previous chapter showed marks made on papers for each animal theme.  For this chapter I have shown mark makers and the effect made when used with bleach.
Ref Page 34
Top image:foam fish stamp, a lace piece which did not work with bleach
second row: plastic embossed sheet, metal rasp, string fingerprint block, herringbone foam block
third row: foam cardboard and string block, feather foam stamp, nuts and bolts, linocut fish stamp
fourth row:magic sponge, didn't work, fruit net.
The most difficult aspect of printing with bleach was to ensure that not too much was used as the image spread on drying.  I had tried to use a milder 'cleanser' as bleach is not something I use but found the results disappointing so resolved to buy some bleach.  As I was concerned that the black tissue I had may have also been a problem I also dyed some white tissue with Quink.  A couple of the mark makers proved ineffective: the lace needed more pressure, I had previously used a printing press when printing this design;  the cardboard designs used too replicate human skin cross section collapsed under pressure and so felt the idea of monoprint as show in page 29 was a better option for taking inspiration from skin cross section
The results below show the impact of thick bleach on both types of paper.
Ref Page 35 a            Ref Page 35 b
Ref Page 35 c            Ref Page 35d
Ref Page 35e           Ref Page 35f
 As my heavy handed dipping of bleach had proved somewhat crude I decided to try a stitch pattern to control amount of bleach onto tissue.
While becoming stumped on the last part of Chapter 4 I had found an ammonite pattern which appealed.  I was also feeling anxious as I had not been doing stitching samples and the idea came, how about stitching a pattern on paper and dying through the paper.
The result of a shell pattern stitched, without thread,  is shown below:
 Again I overdid the bleach! Should show more patience...but liked the idea of the stitch marks perhaps, however, should consider a pricking on a firmer card as when making lace patterns.  I liked the idea that within the pattern there would be an option to put a variety of patterns within each section.
Now the task of stitching some samples!


Thursday, 3 May 2012

Patterns from Animal markings

Aware of a need to carefully look at how to interpret patterns the idea was to concentrate on a type of pattern/marking in both a drawing, print ideas and stitch.  I had become overwhelmed by lots of pictures and sketches and couldn't see the relation with stitched samples so here goes...
The first part of the exercise was to make up story boards using pictures and papers that were being made from the inspiration.  A collection of the papers and swatches appears below each of the themed storyboards.
Starting with the ideas of Scales and fish I concentrated on herrings or Silver darlings as they are known in the North east of Scotland.  
                                           Ref Page 22 a word image sheet          Ref page 23 Range of pen drawings
Could these ideas from my word image sheet be used for printing blocks to sit behind machine stitched columns?
Ref page 22 a) 1 Herring bone stitch perle on 14 hole aida                             Ref Page 22 a) 2  bone game counter and ink drawing
Working on making printing blocks to progress designs for papers and eventually fabrics the following papers were printed;
Ref page 24 blocks made from word image and drawing sheets
From top left an inkjet print was made of punctuation marks in the shape of fish, an original pen and ink drawing on cartridge paper, a foam stamp made using printing ink pad, original pen  and ink drawing on  artist paper, foam stamps of herring bone and 'moving' shapes.
From Bottom left original pen and ink drawing on artists paper , print from lino cut using acrylic paint  and bottom sample using printing ink - have used pencil to indicate possible stitch line ideas, stamp made from fruit net and printing ink 
As well as using the papers for making cuttings for future paper samples my thoughts were considering using digital transfer prints of the samples onto fabric.
The second theme is Feather and birds:

Ref Page 25 word image sheets          Ref Page 26 drawing sheets including 
                                                  monoprints, pencil rubbings and pen drawings
Ref page 27
Top left and centre: monoprint mark making on acrylic painted acetate plate, top right: ink and PVA monoprint
Second row: Left and right monoprint on acrylic painted acrylic plate, centre: third pull of ink/PVA monoprint, 
Third row left: acrylic with medium print from foam stamp, centre: second pull of ink monoprint, right, pencil rub of stitched paper
Botton row: panels of pen drawings
The third theme is Skin:
The photo that started the wheels turning!
This little fellow was found on a walk last April and a colleague decided to take it along for part of the journey.  When looking through photos for animal images I was as much intrigued by the ‘skin prints’ of my friends hand!
Then the second photo came to hand!
While visiting Platt Hall, in Manchester this self portrait by Audrey Walker caught my eye. On the train journey home I decided that my skin section should include a study of the skin of the ‘human’ animal’ alongside  all my other animals.

and the resulting inspiration boards for humans and amphibian:
Ref Page 28 Image boards human skin, Ref page 29 paper patterns
Patterns from page 29 top left: footprint cut in strips, top right; print of felt tip drawing of fingerprints in alternate directions, 
Second row: mono print acrylic paint and medium on acetate plate first and second pull,
third row; crumpled newspaper rolled with acrylic, magic sponge printed, pencil rub embossed sheet, block print string fingerprint
fourth row:  Think these may be disallowed, see below!! acrylic print from embossed papers as with pencil rub above 
I felt the human skin patterns could keep me going for a lifetime!  But also included early rock drawings, petroglyphs/graphs, which fascinate me.  Their history and design simplicity  are something to inspire one on a journey where you are trying to find impact and storytelling in a chosen images.
On the amphibian board I chose to put a full blown up picture of the frogs reflection as I felt this could be cut into strips making an interesting composition in the seminole chapter...is this to be allowed? 
The paper themes for amphibians
Ref Pages 30  
The papers from top left are a magic sponge print using acrylic paint, bubble wrap print with acrylic paint, original pen and ink drawing on cartridge paper, sponge print(second pull off) using acrylic paint, print off of frogging patterns, below which I have made a simple one with silk rats tails - a possible printing stamp!  Below this a series of doodles based on frog footprints and stages of life.  In the bottom centre a series of round patterns made using various stitches on the machine...see rubbing below.
Ref Page 30 a) detail of pencil rubbing 

The last of my inspiration boards shells, horn, beak and claw:
Ref Page 31  word and image board             Ref page 32 patterns, 
Ref Page 33 Ammonite
I had hoped that the strong shapes would inspire lots of patterns and tried to make the patterns shown on page 32 more dynamic by joining them in a series of radiating patterns but they just appeared cumbersome.  While going through my papers I found this simple pattern of an ammonite and decided this could be the piece to work  to concentrate on.  The results move on into the next chapter...


Wednesday, 2 May 2012

Tonal Effects

 For this chapter a series of machine stitch samples on white cotton have been made using my Bernina Activa  140 machine.  I recorded the stitch number used and varied stitch length and width to change the appearance of the stitch across the 4 inch samples. Page numbers and sample references are on each page.
Ref 9 samples a and b    Page 10 samples c and d
  Page 11 samples e and f Page 12 samples g and h
Page 13 samples i and j Page 14 samples k and l
The next set of samples was done with loosening the spool to allow threads to show through and with placing perle threads in spool.  The sample on page 15m) shows the degrees of loosening the spool tension.
 Page 15  samples m and n Page 16 o and p
 Page 17 samples q and r Page 18 samples s and t
Page 19 samples u
Making the stitch samples was a harder exercise than I anticipated. Vary the length and width while sewing proved difficult in keeping ones eye on direction!!! If I tried to pause between varying width or length the piece tended to look bumpy!  I didn't seem to get the differential in stitch widths that was shown in manual and am unsure why this is the case.
I have mounted samples so that I can look at the back of each piece as in some instances the back was as interesting as the 'front'.  Most of the samples would have improved if I had used more double thickness of fabric, however, I told myself the samples would look better once pressed and just kept going!!  

 When starting to do the columns I felt I needed to take careful note of texture patterns in my animal collection before hurrying ahead with samples.  This would help me compare drawings and stitches from the 4 inch samples more closely.