Showing posts with label drawn threads. Show all posts

Friday, 7 March 2014

Tucks, pleats and gathers

Ref 5.7.1

Time to explore tucks and folds which has an analogy in the making of the earth surface but first to explore techniques and possibilities in fabric.  
For the first sample in tucks I used an off cut from my quilting sample from the previous chapter, using it to experiment with manipulating the stitched lines.  Cutting open the layers of muslin and calico cotton that had been stitched over a polyester fleece and restitching and fraying the fabric to make a tucked sample seen on left. 


Ref 5.7.2a

Ref 5.7.2 b

For the next sample I chose a cotton poplin fabric to hand knot with a perle thread.  Pinching the fabric together and then tying the ridges together meant that you could vary the height and direction of the tuck.  The reverse of the piece gave a ditch or crevasse effect.  I was becoming increasingly interested in the back of my samples as they seemed to offer a more relaxed and often more effective appearance.


Ref 5.7.3


The next series of tucks saw me using different fabrics and methods to change direction of the original tuck. In 5.7.3 a sateen cotton was machine tucked and then alternate lines of stitching were used to change the direction of the tucks.  The effect of this was to not only to add textural interest but the shadows added drama.  The crispness of this fabric seems to add to this impact, later samples will show a less dramatic effect
Ref 5.7.5
Ref 5.7.4
Tucks in sample 5.7.4 use the same sateen finished cotton fabric but in the sample the directions of the tucks have been alternated in the top line by clipping and turning back  and stitching some of the loops.  In the lower tucks indents have been cut which could house addition interesting threads or loops for hinge type attachments.  More clipping in sample 5.7.5 but this time a polyester knitted fleece has been clipped and then attached to a pleat of cotton muslin.  The cotton pleat acts as a 'spine' that can be twisted holding the piece in place and opening up the slits.


Ref 5.7.6a
Ref 5.7.6b

A more structured way of moulding the fabric can be seen in the back and front of sample 5.7.6.  Machine stitched darts are used on this already relatively 'stiff' cotton sateen  to produce a free standing shape.  The piece could be worked with hand stitching to emphasis the indents thereby producing more textural visual interest and handle 

Ref 5.7.7a
Ref 5.7.7b

The next set of tucks as seen in 5.7.7a were machine stitched on white cotton muslin and then pressed to one side. The piece was then stitched into pleats that were made on the vertical plane in random directions. Photos below show the back and front and will leave it to you to decide which is which.  The fact that the fabric has a transparency makes this an interesting choice.


Ref 5.7.7c
Ref 5.7.8b
Ref 5.7.8a
For the next series the pleats were cut into triangular sections that were then joined and machined stitch in alternative directions.  I rather liked the selvedge version as it shows more movement and the threaded edges soften the lines of the sections.  While 5.7.8a is more dramatic in tonal contrast and clean lines the other offers a more diffused version.


Ref 5.7.9
 Exploring the frayed edges of lines 5.7.9 shows how a diagonally cut stripe of white cotton muslin is used to give an interesting lined surface to a piece of fabric by a tight machine stitch on the diagonal.  While neither a tuck or a gather in this picture the machine line could be pulled tighter to give a more gathered, rippled surface to the piece. 


Ref 5.7.10a
Ref 5.7.10b
Taking the idea a little further in the 'fake' tuck samples 5.7.10a shows how a series of silk sari ribbons sewn on a calico background can give a subtle colour effect as well as a textured finish by not ironing the ribbons but celebrating the creases.5.7.10b plays on silk sari ribbons on silk pleats with are woven into a square.


Ref 5.7.11
But now back to base and exploring gathers: 5.7.11 a large square 'ballon' of cotton muslin was made with the outer edge hand stitched and gathered.  This was then attached to a square of cotton calico with a hem stitch.  The top square was then manipulated to fall in clusters of gathers which were then hand stitched into the base. The gathers could be filled with more pronounced stitching or possible attachment of beads or shapes to embellish the piece.


Ref 5.7.12
Ref 5.7.13


A more regular gathering was given to the following two samples. Following the guidelines for creating a smocking surface sample 5.7.12 shows a cotton organza was machine stitched in even rows of a long running stitch which were then pulled into a tight column. This sample contrasts with the hand stitched cotton poplin sample of 5.7.13 which shows a more regular series of columns.  The hand stitch was easier to work in stitches that lay directly beneath each other than the more random appearance of the machine stitched sample which had more of a ruched appearance.  This could be emphasised or evened out by working hand stitches over the ridges but I rather liked the idea of pulling some of the ridges apart to give a more sculptured appearance.


Ref 5.7.14 a
Ref 5.7.14b


For 5.7.14 pleated some heavier weight cotton calico which was then cut and reversed. Enjoyed the little pockets that the pleats made which are best seen on the reverse. Decided to play so did a bit of stuffing and pulling apart and staked piece onto a diagonal!   


Ref 5.7.15a
Ref 5.7.15b

Reverted to a lighter weight cotton calico decided to pleat on the diagonal for sample 5.7.15a. On reflection while writing this blog think it would have been better to have worked on a larger piece of fabric and done more random lines that cross at different intersections and angles.  Again the reverse seems to be the more inspirational side... the key seems to be no peeping, allow it to happen!

Ref 5.7.15
The last series of samples are worked in heavier weight and more open and even weave fabrics. For 5.7.16 I have pulled threads in both directions and used this to shape the different fabrics. On the bottom sample you will see that the open weave clearly shows the lines where the threads were pulled.  While this sample was difficult to pull it allows the shapes to be concave or convex... a finger can easily alter this! The shapes could be stuffed to keep the shape but it was a bit like plastic bubble wrap I rather liked fingering them to change shapes! Didn't have the satisfying noise though...The top sample was a lighter weight but also even weave.  Machine stitches were worked as a grid and then each direction was pulled to give a cluster of shapes. While the shapes were pleasing the feature that added to the piece were all the pulled machine threads. So a key point to note, don't tidy up the piece let it rest before the next step or any trimming.


Ref 5.7.16
Ref 5.7.16
As a complete change this canvas took its shape with no stitching.  I loved the way it held the finger pressed pleat and then allowed me to curve it. What was a very stiff structured fabric was surprisingly malleable.  I need to experiment with this in the stitching chapter to see if it is better to stitch this once it is shaped. Maybe you could lay a lighter stitched fabric over it, could net be the answer? 

Ref 5.7.17


The next  sample 5.7.17 uses a loose weave hessian fabric and a bit of tongue in cheek.  The curved wire used is in fact from a bra that was so uncomfortable it got cut up?  The oblong piece of hessian did slide onto the stiff wire easily but the wires fixed shape resulted in  a pucker in the fabric. 
Ref 5.7.18 ridge
Ref 5.7.18 seam
Using the hessian again the sample shows paper thread that was hand stitched, no needle, into the weave as a simple running stitch with an additional run of stitches used to make a tuck.  Gently pulling the thread brings the piece into a 3D ridge or seam.


Ref 5.7.19 original
Ref 5.7.19 solarise
For the last piece I decided to see how to manipulate one sample into four images so here goes.  Following on from sample 15 in this chapter there was some open weave fabric left that had withdrew threads.  Taking a black wired paper thread sample 5.7.19 appeared.  The adventure then began with a solarised image, then a whirl then a whirl and added coloured embossing!


Ref 5.7.19 whirl

Ref  5.7.19 whirl and colour emboss


Wednesday, 2 October 2013

Stitchery into paper

 The task began with looking at what layers of pulp and paper or fabric went together for the stitchery project .  The decision making would chop and change as I progressed.  The changes have been charted to show original thoughts and see how they changed as time moved on.  
The first sample, 4.7.b3 from previous chapter, isn't too true to colour but have also included  two shots that happened when it was held up to the light - autumn is approaching so evening light  is bringing another dimension.  The background fabric is one of my rust dyes which was then over dyed with a procion dye before being selected for this sample. 

Front shadow                                                                 Ref      4.8.1 mounted                                                     Back shadow
Ref 4.8.1a
Ref 4.8.1a influence
The contrast would come after I had secured papers together with self coloured thread. Touches of stitches in blue were introduced where I played with the idea of rune letters before running a thicker thread through the spaces of drawn thread.  The ribbon was too bold so decided to 'ladder 'it to give a soft effect see bottom right of sample 4.8.1a.


Ref 4.8.2
Ref 4.8.2 The influence for this sample came from Chapter 2  4 .2.13 seen left. This sample had more paper pulp added to it from original idea in chapter 7 see Ref 4.8.2. an additional layer from the calico fabric that had been dyed with the paper pulp and used as a strainer when tipping water away thereby trapping pieces of pulp which were left to dry. I then decided to change background fabrics before sewing the final sample 4.9.2a  This was done to allow fraying and seeing through to background layer.  All layers were first secured with machine stitching I then took a rayon ribbon to make marks.
Ref 4.8.2a

Ref 4.8.3
4.8.3 influence
The letter in sample 4.8.3 was made from pulp. The background paper was attached to loose threads laid in a loose grid pattern. Random button hole stitch areas were stitched in previously pulled threads to attach paper and threads to a brusho dyed paper.  Areas of herringbone stitched in double twisted variegated Sulky threads were added.
The letter shape was a slightly less than 90 degree L shape which could conceivable considered as an angular root of the 'm' shape from my mail series in chapter.

Ref 4.8.4
Ref 4.8.4 detail
The sampling method of paper onto threads as shown in previous sample was used for 4.8.4 but decided to show the thread side this time.The spaces between and shapes of the paper made me recall the written block patterns from Chapter 2 and I wanted a stitch that reflected a loopy appearance.  This took me back to Module 2 and the ribbon stitch was the one I chose, number 20 on my machine.
Ref 4.8.4 influence
Ref 4.8.4 influence


Saturday, 17 August 2013

Drawn Thread Work Stitchery

Stitchery ideas for decorating fabric and needle weaving on bands of withdrawn threads
Ref 4.6.1a and b
A)Top row;variegated perle thread
Second row; procion dyed cotton tanne and cord thread experiment with letter shapes using weaving and buttonhole stitch -more practice needed!
Third and fourth row; As many of my pulled threads were short used them to knot threads together.  An 'm' should be visible in third row! Not sure if I am seeing things but in pulling  six threads into a horizontal 'v' shape in fourth and then catching them with a series of knots the image reminds me of  4 .2.21 scribbler 'calligraphy' image.
B)  Top row: Needle weaving and buttonhole stitch
Second and third row; fabric strip weaving and wrapping
Fourth row; diagonal fabric and jute thread wraps
Fifth row; herring bone stitch


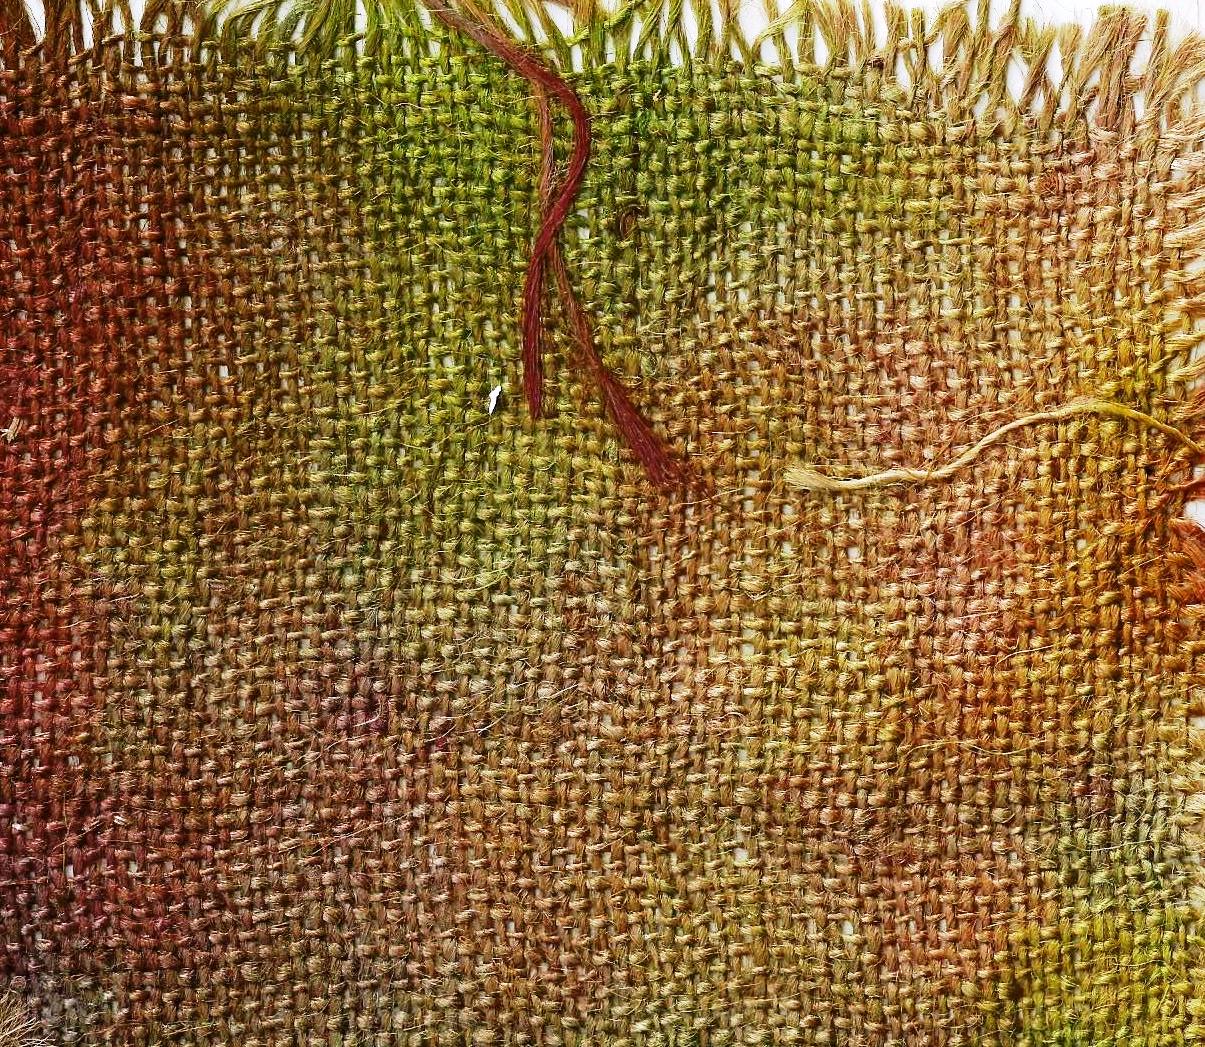
                                                                                                                              Ref 4.6.2   Moving on from the dyed yellow cotton I decided to pick a looser, bulker structure of fabric.  Taking advantage of a friends dyeing session with procion dyes the following happened...an overwhelming green and pink. While pleased with the fabrics that came from the session I was concerned that they were not in this modules chosen theme, however made the decision to use the hessian  as I wanted to experiment on the looser weave!

Ref 4.6.3                                                                                      Ref 4.6.4
The diagonal stitching on bars sample, 4.6.3, shows threads that were dyed in the procion session, string, perle,cotton ribbon and strips of fabric.
In 4.6.4 diagonal stitching on cross sections shows variegated perle threads being used
Introducing  machine stitching into the next two samples, tucks being held with hand stitches in 4.6.5, left .  Dyed string being used to connect the machine caught threads in 4.6.6, right. For me this piece had a look of the Arbroath Declaration about it, see 4.2.3.
Having gone off piste thought it was time to return to a more charted territory and dyed some even weave cotton fabric with Brusho dye.  While painting a large piece of fabric, to allow me to obtain longer threads, I tried to ensure interesting blocks or strokes of colour where on pieces that would provide the base for combining more hand and machine stitching. Ref 4.6.7, on right was an exercise in diagonal step machine stitching which proved problematic and uneven.  Pulling out threads and then enclosing the remaining threads was difficult and at one point the title for this piece was - 'when you are in a hole stop digging'. But, not for the first time I persisted! I often find that lessons that stay in our mind are where you struggle and this would be a classic. Lesson one: pull out a very even grid, lesson two: make the width of columns to be stitched of a size that the zigzag stitch will cover. lesson three: Increase tension on stitch, lesson four: diagonal means alternate steps, and before filling the page with lessons oversewing doesn't make it better!
As progress was made on the next two samples the use of the wing needle was an answer to one of the lessons, however as in all this things I realised that the weave I was using didn't get the results from the wing needle.  While it did provide holes to stitch through the double weave held the fabric fairly rigid. A lighter fabric would have produced a more obvious hole.
                                                        Ref 4.6.8                                              Ref 4.6.9a
Ref  4.6.9b mounted

While considering the use of stitching to make lettering I was interested to find this advertisement from Audi.  It showed how missing lines did not detract from being able to see the meaning of the sentence!