Showing posts with label module 3. Show all posts

Thursday, 14 February 2013

Resolved Samples - revisited

The review of all the Modules done to date was a stimulating exercise helping to focus my mind on the prospect of three resolved samples! Certain aspects that needed more work had stayed in my mind and helped form my choice of three patterns; curves, scrolls and paisley. While using pin boards to collect reference points for each Module the method encouraged a wide and diverse storyboard and I felt the need for more specific thoughts of design ideas. Working boards/sheets became an important tool, before powering ahead with sewing samples and hoping for the best.  Drawing is not my best point, so the cut and paste montage of key pictures and words took the panic out of the exercise.  It will also give me practice of a composite sheet required for Chapter 11
Resolved sample 1 Curves

when doing the Fibonnacci sequence in Module 2 Sian encouraged considering  'cut in curves', rather than the straight lines used to produce the egg, shown on right:

Using a yellow felt with a red textured overlay a mixture of fabrics were chosen  and interwoven to give a variety of  sheen/dull, textured/flat character. A variety of stitches were applied to hold the pieces in place and give movement to the piece.  Dyed squash seeds were used to balance the design. 
 An oval shape made from felt framed the final piece.  Sian encouraged me to revisit the framing.  The frame seemed to overwhelm the piece, after a play decided to turn piece upside down and just put a background of the topsurface behind it - a white board seemed to be too much of a contrast.
Resolved sample 2 Scrolls
The scrolls on the door of Lichfield Cathedral and corrugated cardboard scrolls that encouraged Gimp play on the computer are the basis for this sample:
A hand dyed lightweight silk was bonded to felt, with the heat giving a slightly textured look to the silk. Remnants of machined stitched hand made papers from Module 1's resolved sample were bonded on top and the scrolling began with hand made and machine stitched cords.  A variety of hand counching and other embroidery stitches, scroll, bullion knots were used to embellish the design.  Spiral wire, hand beaten wire coils and beads were added. Work in progress


The final sample was cord edged and mounted on felt.  Encouraged by Sian to add some of my thicker cords this is the result.  As I did not want to hide previous detail decided to spiral out and present a third dimension.

Resolved sample 3 Paisley
The association of wings and stitches in Module 2, and the paisley image in earlier chapters of this module gave this shape priority for further development.
Chiffon was bonded to hand dyed muslin for the background - it was a disadvantage when taking photos as the  chiffon had a shimmer that distorted the colours, but ideas of cutting this back once the sample had been stitched were considered a possible solution if the final sample was still dominated by the shimmer. 

 The final sample was mounted in a cardboard frame covered with hand dyed felt.  Some of the chiffon was cut back, however, feel the flimpsy cut shape at bottom right edge should be tucked behind the frame  - it looks rather weak and doesn't add to the piece! It was becoming an exercise at knowing where to stop and the phrase, less is more, kept coming to mind!
  With Sian's comments on the framing having resonance with my own concerns this piece was also revisited.  The results show a less formal piece.  The piece on the right seems to be gaining my vote.  It uses a lighter weight of cotton than in sample and seems to hold the eye for longer.


The lessons learnt in revisiting will be ones I won't forget.  Making the frames had been awkward not least making an oval shape, but found a wonderful tip on how to draw an eclipse with two pins, a piece of thread and a pencil.  In making the oblong frame I thought I was home and dry, the card was pre cut, but decided to dye the felt as the colour was not 'right'.  No need to let you guess, the felt shrunk and had to keep trimming the frame...something should have told my brain to rethink at that point!!

Friday, 25 January 2013

Beads

From buttons to beads, these two samples  started life as buttons but thought they sat better in the beads chapter.      Ref 3.8.1
Taking the two colour themes two shape templates were chosen from earlier chapters to work the following designs, the paisley shape for Ref 3.8.1 above  and Ref 3.8.2a below

Wanting to get a feeling of movement, but not be too formal, shapes were sketched onto fabric and built the texture to the designs as I went along.  In hindsight think a bit more consideration of the design detail may have achieved better areas of work. I seemed to move onto different ideas before a larger enough area of one idea had been worked. In the yellow/purple sample, Ref 3.8.3 think I went too far in the other direction!!
Ref 3.8.2b side detail to show raised effect
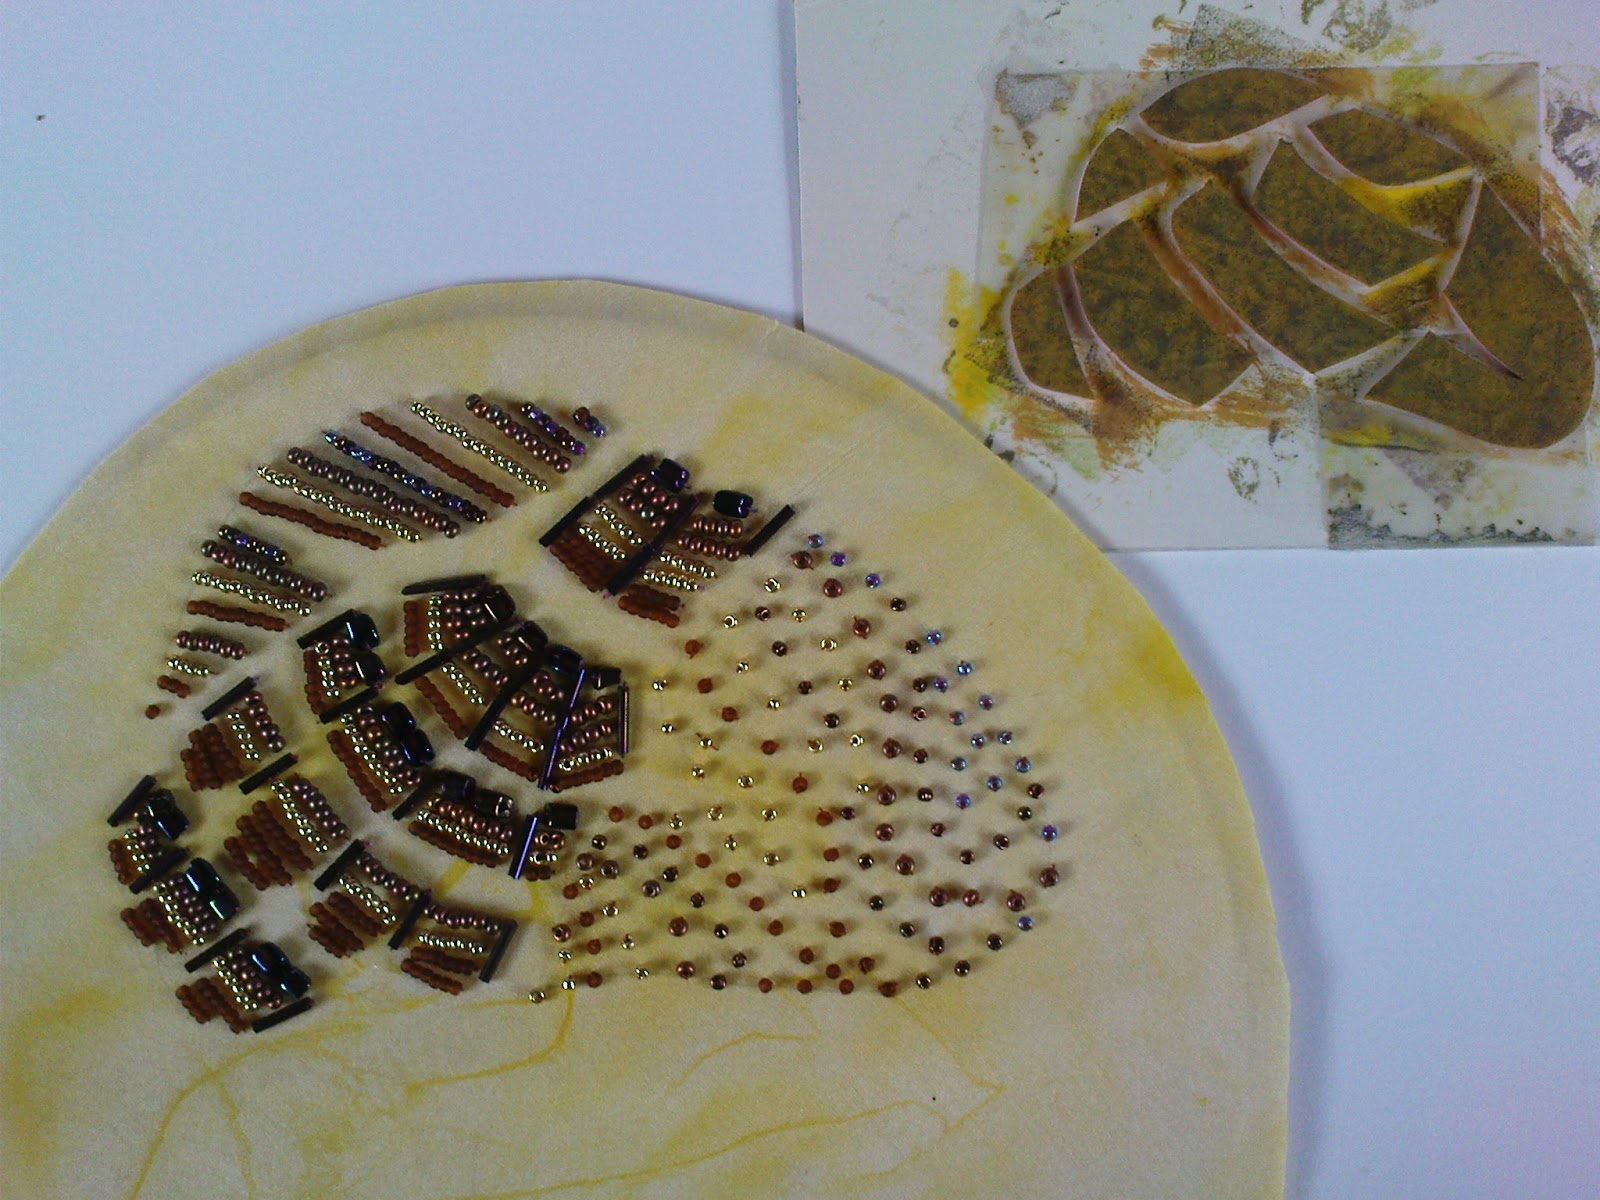
The other shape selected was the shell.
Ref 3.8.3 a                                                                                                 Ref 3.8.3 b

The shell stamp above, has gaps between the stamp giving a feeling of ridges over the surface. Perhaps a line of hand stitching would define this more in the beaded piece.

To get back on track with the specific tasks asked for in this chapter the sample Ref 3.8.4 includes a range of unconventional 'beads' and a few more methods of stitching down onto a hand dyed muslin and felt base with chiffon on the right hand side of the panel.

Going from top left hand section:
Shell fragment and short ribbons of 'pearl' beads; cogs and copper nails attached with buttonhole stitch; dyed squash seeds in a nest of threads, attached with fly stitch, covered in chiffon; assorted metal nuts covered in chiffon and secured in straight stitch and cross stitch grid and a series of bullion knots; 
bottom row left hand section:
computer floppy disk centres covered with threads or felt attached with whipped spider stitch; shells attached with button hole stitch(bottom left) or cross stitch; loop of dyed squash seeds attached with daisy stitch and waste core metal couched onto fabric; electronic circuit components attached with long and short stitch, over and under a chiffon layer.     To show more detail, see below.
                                            detail of Ref 3.8.4 a                                                   detail of Ref 3.8.4.b

Monday, 21 January 2013

Button making

 Buttons or brooches - stick pins could be added to these individual pieces.  Initially took photos of these on complimentary fabric but feel they look better set out in a more uniform arrangement.  
                                                               Ref 3.7.1                                                                     Ref 3.7.2

The top right hand button in 3.7.1- in which  twinned ombre perle thread was worked around paper 'spikes'. The top right hand brooch in 3.7.2 was a selection of threads mounted on soluble fabric, layered with beads onto a piece of suede, mounted on thin sheet of silver and then hand made card - it was one of a series made inspired by skies in the Western Isles.  
While doing these pieces it reminded me of others made before using paper yarn and basket making techniques. Two of the pictures below show pieces used as jewellery the central picture shows the begin of one of my small pots - using figure of eight weave
Now for a bit of spiralling fun, a  brooch - Highland fling  range- where spiraling wire forms the base of the body and a Celtic twist at the belt line.  Inspiration thanks to Serena de la Hay, Wicker Man and Mary Heumansperger's book Fabulous Woven Jewellery.

Sunday, 20 January 2013

Tassels


  Making a series of tassels provided an indulgent activity over the festive period, made more enjoyable by finding these objects while I was away. These acorn or thistle tassels provided a wonderful pastel, faded tapestry cushion with a splendid edging where some tassels had burst open. I set out to replicate this in 3.6.2.

Setting out to combine a range of tassels in colour groups the results show:
Ref 3.6.1  from left to right                                          
Rayon thread wrapped round free machine stitched fabric toggles
Tapestry wool and ribbon
Tartan turks head withfrayed centre tassel
Ref  3.6.2
Realised  how much thread was used on acorn tassel  -mine look skinny in comparison could there been a hidden kernel in the centre?

Ref 3.6.3 a 
This shows how I used up loose threads  to make beads  that could be used as shown in 3.6.4. Thanks to Alma Stoller for this tip. Could these be used to make a 'soft centre' to a tassel and reduce the amount of thread needed for the tassel? 
Ref 3.6.3b gives the answer, not an easy task, tried to knot the tread to increase bulk.  Putting bead in middle of small tassel proved very fiddly on this scale. Think I will just have to go for slightly thicker thread and uses lots of it!


Using wooden beads, handmade beads, glass beads, wrapped rings and champagne cork to add interest to the tassels                                                                                                                 
Ref 3.6.4 a                                                                                                                                                         Ref 3.6.4.b

From left to right
The top of the red tassel is raffia, with the smaller one in perle thread 
The green tassel is made from silky thread

The yellow tassel, 3.6.4 b is pulled through a sellotape cardboard template which has been wrapped in sari yarns and is topped with coloured silk cocoon.  The body of the tassel includes tapestry wool, metallic cord


Ref 3.6.4.c
Seed beads threaded onto rayon thread with metallic thread used to make a cap and loop.
Initially I was disappointed that this tassel settled into two 'legs' as the beads seemed to 
wind around each other and seperate it rather than going into a cleaner line.
Its beginning to appeal, perhaps it would look better if the method was used on a shorter tassel
Ref 3.6.4 d
A champagne cork provides the mould for the top which was covered with fabric made from threads which had been machine stitched to soluble fabric. Two fabric skirts were added.  It looks a bit heavy handed so maybe it should be called 'morning after the night before '!! 

Making a looped head for a tassel
 Ref 3.6.7 a
This blog seems to be a series of excuses for mistakes! In splitting this tassel and handsewing the top to form a loop it became increasingly difficult to make an even wrap, perhaps a light series of machine sewn stitches would make the base easier to sew?
Ref 3.6.7 b keeping the cord uncut and trying to wrap the bunch proved ackward and slippy.  Ref 3.6.7 c, below, even wrapping the bundle was difficult to keep wrap threads from slipping when yarn was bent over                                              

Gave in and tried with thick and non slip threads!!! Thought wrapping was supposed to be easy but like all things its the starting and finishing that proves problematic!
Ref 3.6.7 d                                                                                Ref 3.6.7 e  


The metallic threads for all samples were wound over a metal frame and free machine embroidery  was used .  Samples 3.6.8a were knotted and twisted Heavy machining was done on samples 3.6.8.b right hand sample and samples 3.6.8c I found it easier to use a zig zag stitch in line with the threads rather than a straight stitch at a 90 degree angle.  

Ref 3.6.8 a                                                               Ref 3.6.8 b                                                                 Ref 3.6.8.c

                                                                                                  
For a reference point to some of my other work I have included this upside down tassel which was made for a project on small baskets made from thread.  This sample shows twining threads of string  with linen and then unwinding the string to make the 'burst'.