Monday, 14 October 2013

Book type structures

Investigating book structures in preparation for my finished item I visited structures that had been completed over the years before embarking on new  samples specific to Module 4.  Hope this is acceptable! Ref 4.10.1 shows a shape I made for Module 1 


Sample 4.10.2 shows Button Book made in memory of my mother and father.  Using a tapestry made with my mother I made calico 'pages'.  Each page contained memories that my sister and I shared of them.  Linking the idea of 'pressing buttons' on different subjects i.e. music they liked, their hobbies and interests, places and journeys etc we shared together a collection of photos and memorabilia.
Over the years I have used origami books to record key memories of a year, business cards of inspiring artists, ideas from Christmas carols for making Christmas cards, diaries of a specific holiday- somehow a small piece of paper to fill a day is less intimidating than a large sheet of paper. Here are a some of the pieces:
Memories of 2010                Business card holder


                                  ' Outside In' exploration 2009,paper and fabric/board cover
Inspiration, 'In the bleak mid winter' lyrics, coloured threads, images


A month's diary at Woodbrooke

And now for some ideas not tried before:

Ref 4.10.1a and b above The stick, attached with rubber bands, was rubbed with bronze 'rub on' to match the acrylic painted and crunched magazine paper.  The inside Lokta papers chosen to give a feeling of nature.

Ref 4.10.2 a and b.  Using magazine paper that had been folded and glued to make a firm cover to black papers the book was held in place by cardboard letters and rubber bands.


Ref 4.10.3 a and b Magazine paper again folded and glued this book was stitched using a button hole stitch in a fan shape and thread to replicate the tree structures.  In side black paper was interleaved with tracing paper in varying sizes.

Ref 4.10.4.  Using an offcut of coloured newspapers from an earlier module this booklet used tissue paper to make the inside papers with a normal running stitch used on one seam and a knotted stitch used on the other seam to add interest.

Ref 4.10.5 a and b. A black and white theme inspired by this cartoon simplicity seemed the key with just a three hole joining stitch to alternative black and white pages.

Intrigued by the theme of this module I had decide to take a break to Burnbrae, Nr Kelso to sign up for a course with Mary Sleigh.  The book cover seen in sample 4.10.6 a and b and the final samples shown in 4.10.8 are the pieces made during a truly inspiring two days.  The book leaves shown in 4.10.6a and 4.10.7a, b and c were made on returning home and while they are not to be used in the book cover shown they were a trial run at how I would approach completing the project.

                                  Ref 4.10.6a cover and papers      Ref 4.10.6b inside book cover
Ref 4.10.7a, marking up to ensure holes were in correct position through all pages
Ref 4.10.7b and  4.10.7c ribbon looping with rayon perle - not the best thread to use as very slippy but colour was right and it was a very old thread that I had had for years!

And last but not least a book dedicated to the inspiration of Gudrun and Mary completed at Burnbrae.


Wednesday, 2 October 2013

Stitched Edges

Ref 4.9.1
Ref 4.9.2
Contemplating how the lettering and drawn thread theme could influence the edges of papers I made the following five samples. The idea of loops as well as the angular placement of letter blocks in Chapter 2, shown at the bottom of this blog, where with me for this exercise. Sample 4.9.1 uses machine stitch 6 on my Bernina Activa 140 which provides a multi outlined 'v' shape done here in Sulky variegated cotton thread.  To complete the edges of paper not at the fabric edge I hand sewena variegated perle thread in feather stitch. The background fabric was a thin muslin that was used as a sieve when draining of the water from last pieces of paper pulp and some of the pulp dried onto the fabric.
For sample 4.9.2 I pinned, studded and added tied loops to the edge, this would allow layers to be added but on the left hand side pinned some wide bias binding which was slit so that it could be used as a hinge. The bottom edge had hand stitched button hole detail which could also act as a joining edge if another edge was butted against it.
Ref 4.9.4
Ref 4.9.3
My next themes bound the edges of the paper to add strength.  Sample 4.9.3 on left shows felt borders using machine stitch 7 over the paper and with pulled threads used to decorate the edge with loops or random tied threads replicating the loops and straight lines in the word 'calligraphy'.  This broke up the 'hard' straight edge but border sample 4.9.4 keeps it line when bound in hand dyed muslin and a hand stitch to emphasis lines. More random pieces of the fabric were hand stitched on the paper.
Ref 4.9.5
Ref 4.9.5a

The samples, 4.9.5 and  5a show one piece of paper that was too large for the scanner but the run of a double line of a machine stitch, stitch 14 on my machine, and used on the edges, was also placed in the middle to show that the paper could be folded into a book shape.  The rounded edge of the paper on the bottom left of 4.9.5 would probably look better  as the top right corner of a finished cover, giving a glimpse into the content or index of the book. As in sample 4.9.2 the background fabric was a 'sieved' fabric.


Details from Module 4 Chapter 2


Stitchery into paper

 The task began with looking at what layers of pulp and paper or fabric went together for the stitchery project .  The decision making would chop and change as I progressed.  The changes have been charted to show original thoughts and see how they changed as time moved on.  
The first sample, 4.7.b3 from previous chapter, isn't too true to colour but have also included  two shots that happened when it was held up to the light - autumn is approaching so evening light  is bringing another dimension.  The background fabric is one of my rust dyes which was then over dyed with a procion dye before being selected for this sample. 

Front shadow                                                                 Ref      4.8.1 mounted                                                     Back shadow
Ref 4.8.1a
Ref 4.8.1a influence
The contrast would come after I had secured papers together with self coloured thread. Touches of stitches in blue were introduced where I played with the idea of rune letters before running a thicker thread through the spaces of drawn thread.  The ribbon was too bold so decided to 'ladder 'it to give a soft effect see bottom right of sample 4.8.1a.


Ref 4.8.2
Ref 4.8.2 The influence for this sample came from Chapter 2  4 .2.13 seen left. This sample had more paper pulp added to it from original idea in chapter 7 see Ref 4.8.2. an additional layer from the calico fabric that had been dyed with the paper pulp and used as a strainer when tipping water away thereby trapping pieces of pulp which were left to dry. I then decided to change background fabrics before sewing the final sample 4.9.2a  This was done to allow fraying and seeing through to background layer.  All layers were first secured with machine stitching I then took a rayon ribbon to make marks.
Ref 4.8.2a

Ref 4.8.3
4.8.3 influence
The letter in sample 4.8.3 was made from pulp. The background paper was attached to loose threads laid in a loose grid pattern. Random button hole stitch areas were stitched in previously pulled threads to attach paper and threads to a brusho dyed paper.  Areas of herringbone stitched in double twisted variegated Sulky threads were added.
The letter shape was a slightly less than 90 degree L shape which could conceivable considered as an angular root of the 'm' shape from my mail series in chapter.

Ref 4.8.4
Ref 4.8.4 detail
The sampling method of paper onto threads as shown in previous sample was used for 4.8.4 but decided to show the thread side this time.The spaces between and shapes of the paper made me recall the written block patterns from Chapter 2 and I wanted a stitch that reflected a loopy appearance.  This took me back to Module 2 and the ribbon stitch was the one I chose, number 20 on my machine.
Ref 4.8.4 influence
Ref 4.8.4 influence


Thursday, 29 August 2013

Applying paper pulp to woven fabric grid

On defrosting the paper pulp that was left from previous chapter I realised the pink and grey pulp would need to be coloured. While it defrosted I pulled the threads on a neutral a fabric.  Realising that by using Brusho powder of blue and yellow for the pulp would also colour the fabric I set the fabric on cloth pads and then proceeded to make the paper.
The effects presented were not too dramatic. The blue samples 4.7b 1 and 2 above show the colouring bleeding into the fabric but  not obliterate the neutral colour completely. In sample 1 the threads had been pulled but left at top and botton to provide a curled textural effect.  In sample 2 the pulled threads were laid loosely onto  a cloth pad before being  layered with a thin layer of pulp.  Possibly the nicest effect was the build up of paper ridges in sample b1 where  layers of pulp from various dippings began to form on the cloth sample. This textural effect - an accident - could play an important design feature in later chapters. 
The yellow colouring, seen in sample 4.7b3 below,  did not completly deaden the pink flecks in the pulp but produced a bright lemon yellow fabric to back the orange paper - the variegated perle thread used in the sample appeared to be uneffected. The grid was decorated with diagonal lines of perle thread to interpret lines of lettering which will be emphasied in later chapters.

With an attempt on apply pulp to the fan I did a 'belts and braces' job on the mesh used to cover the shape, see samples below 4.7b4a,b,and c.  Two thicknesses of mesh were used and the fan was plunged into pulp bath and the result shows that I probably should have double dipped or used one mesh.  Although I did not want complete coverage much of the paper stuck to the mesh when dried.  The resulting paper was not a complete disaster - it had texture, but of the mesh rather than the ridges, and it also had a hint of a letter in the alphabet which looked promising!
On my next sample,  below 4.7b.5 I decided to leave the wrappings of thread and ribbon, which had been dipped into paper pulp, on the frame.  In order to use this as a sample for the next chapter Stitchery on Paper I felt the tension of the frame would help me in the stitching process.


At the end of this exercise I decided to muse further on the sample from my last chapter, shown below, it had been my idea to work on this as a grid on the fan shape and dip into paper.  But having seen the ridges forming on paper pulp in 4.7b1 I was considering forming  'fabric' into  the angle panel shapes of the fan with the paper ridges forming the structure. Sian had suggested that the fan shape could be made from gathering one edge of a rectangle. There was much to muse . So this fabric was to be saved for more experimentation when I had time to get my head around the structure that would be the outcome!

For now the task is to set off and consider backing fabrics for the samples in this chapter and start stitching.

Saturday, 17 August 2013

Wrapped frames to make grids

For my frames a wooden sewing ring and different sizes of mountboard frames were used;
Ref 4.7.1
Ref 4.7.2 a and b
The top sample 4.7.1 was made using the sewing ring. I wrapped ribbons, cords, perle thread around it and then, trying to achieve a web like structure,  machine stitched over these threads in a circular pattern.  At certain points I captured small pieces of fabric and then a variegated perle thread was interwoven and stabilised with stitches and knots.
For sample 4.7.2a and b a mountboard frame was wrapped to provide a warp.  The sample 2a on left was then handstitched with random series of buttonhole stitch.  Sample 2b on right had ribbon used as weft which was then machine stitched.  To provide stability to fabric a machine running stitch was used before cutting threads from frame.


Ref 4.7.3 This sample was again made by working over mountboard frame but this time a perle thread was wrapped to give a wider work surface.  Strips of fabric were interspersed with perle hand weaving blocks.  A machine stitch was worked over the fabric strips to hold fabric.
Ref 4.7.4 shows the same mount but bound on warp and weft by perle thread which were then secured with machine stitching. Hand weaving in contrast thread produced the 'V' .  Fascinated to see that there were only eight letters of the alphabet that could not be made from this v shape! But all letters could be made using the technique.
Using recycled sari strips for the next wrapping Ref 4.7.5
The crossings were tied with procion dyed cotton ribbon, leaving long 'tails'.  These were then oversewn with machine zigzag.  A perle thread using buttonhole thread then formed a rounded 'V' !!!
While making the pieces for chapter 6 and 7 I had collected a cluster of threads and in an effort to use up things as I went along decided to make a new grid for future use. See ref 4.7.6 below.  It was made by placing on water soluble fabric and machine stitching in place.  As soon as I had dissolved the fabric I had a 'better' idea.  Sian had said that the fan shape in 4.4.4b made a lovely grid and as I had lots more yellow threads to use realised I could re arrange using the same method but in a more exciting shape.  The fan or shell like shape was beginning to nurture thoughts for my book like structure.  Suddenly Chapter 8 was beginning to promise an addition task to see how this shape could feature - that is once I had mastered the art of applying paper pulp to woven fabric on squares or oblongs! 

Ref 4.7.6

Drawn Thread Work Stitchery

Stitchery ideas for decorating fabric and needle weaving on bands of withdrawn threads
Ref 4.6.1a and b
A)Top row;variegated perle thread
Second row; procion dyed cotton tanne and cord thread experiment with letter shapes using weaving and buttonhole stitch -more practice needed!
Third and fourth row; As many of my pulled threads were short used them to knot threads together.  An 'm' should be visible in third row! Not sure if I am seeing things but in pulling  six threads into a horizontal 'v' shape in fourth and then catching them with a series of knots the image reminds me of  4 .2.21 scribbler 'calligraphy' image.
B)  Top row: Needle weaving and buttonhole stitch
Second and third row; fabric strip weaving and wrapping
Fourth row; diagonal fabric and jute thread wraps
Fifth row; herring bone stitch


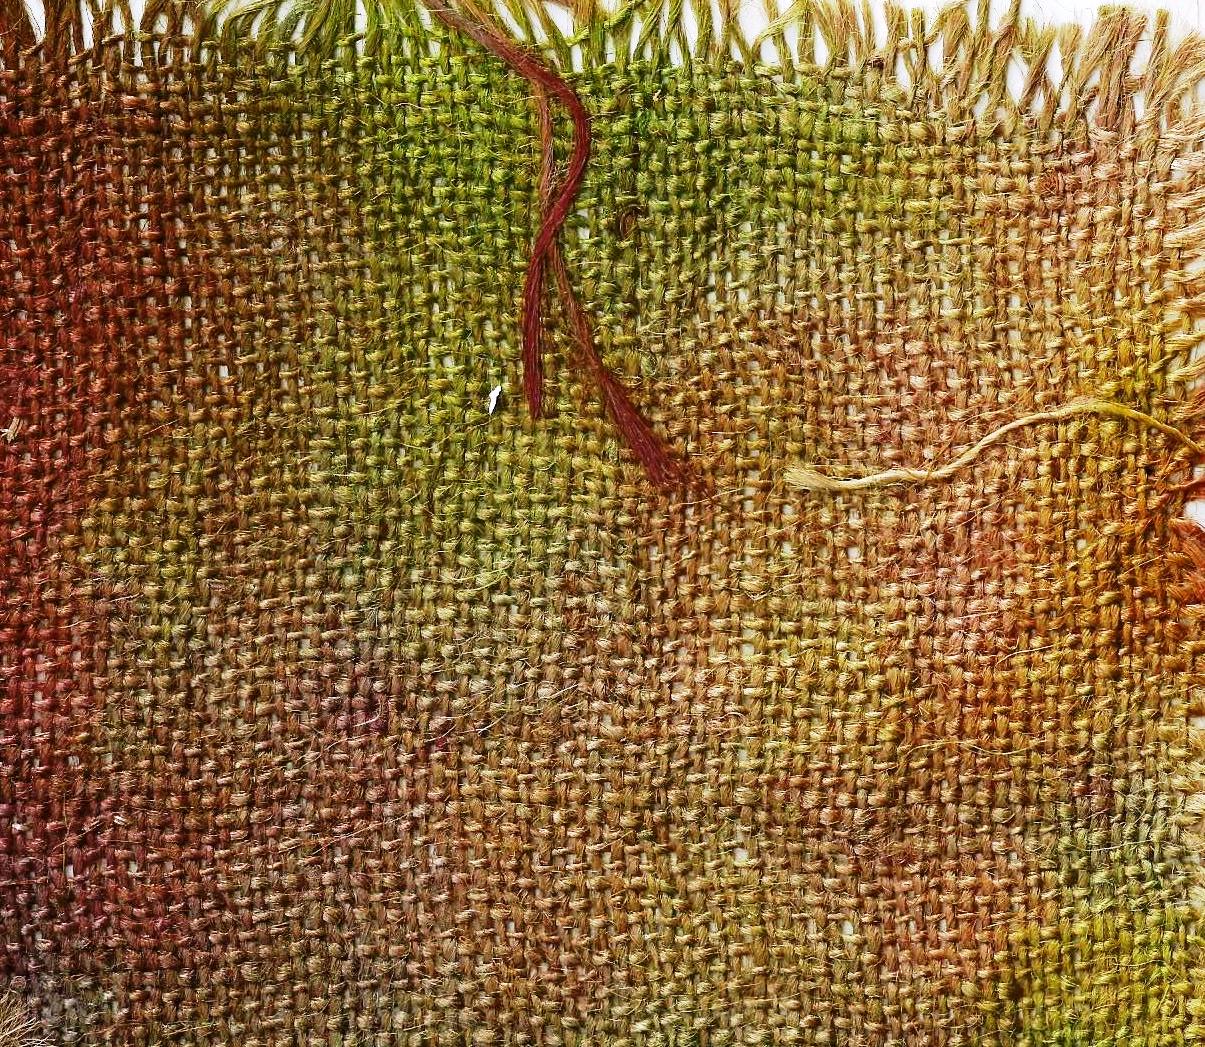
                                                                                                                              Ref 4.6.2   Moving on from the dyed yellow cotton I decided to pick a looser, bulker structure of fabric.  Taking advantage of a friends dyeing session with procion dyes the following happened...an overwhelming green and pink. While pleased with the fabrics that came from the session I was concerned that they were not in this modules chosen theme, however made the decision to use the hessian  as I wanted to experiment on the looser weave!

Ref 4.6.3                                                                                      Ref 4.6.4
The diagonal stitching on bars sample, 4.6.3, shows threads that were dyed in the procion session, string, perle,cotton ribbon and strips of fabric.
In 4.6.4 diagonal stitching on cross sections shows variegated perle threads being used
Introducing  machine stitching into the next two samples, tucks being held with hand stitches in 4.6.5, left .  Dyed string being used to connect the machine caught threads in 4.6.6, right. For me this piece had a look of the Arbroath Declaration about it, see 4.2.3.
Having gone off piste thought it was time to return to a more charted territory and dyed some even weave cotton fabric with Brusho dye.  While painting a large piece of fabric, to allow me to obtain longer threads, I tried to ensure interesting blocks or strokes of colour where on pieces that would provide the base for combining more hand and machine stitching. Ref 4.6.7, on right was an exercise in diagonal step machine stitching which proved problematic and uneven.  Pulling out threads and then enclosing the remaining threads was difficult and at one point the title for this piece was - 'when you are in a hole stop digging'. But, not for the first time I persisted! I often find that lessons that stay in our mind are where you struggle and this would be a classic. Lesson one: pull out a very even grid, lesson two: make the width of columns to be stitched of a size that the zigzag stitch will cover. lesson three: Increase tension on stitch, lesson four: diagonal means alternate steps, and before filling the page with lessons oversewing doesn't make it better!
As progress was made on the next two samples the use of the wing needle was an answer to one of the lessons, however as in all this things I realised that the weave I was using didn't get the results from the wing needle.  While it did provide holes to stitch through the double weave held the fabric fairly rigid. A lighter fabric would have produced a more obvious hole.
                                                        Ref 4.6.8                                              Ref 4.6.9a
Ref  4.6.9b mounted

While considering the use of stitching to make lettering I was interested to find this advertisement from Audi.  It showed how missing lines did not detract from being able to see the meaning of the sentence!